How to set up a Review profile
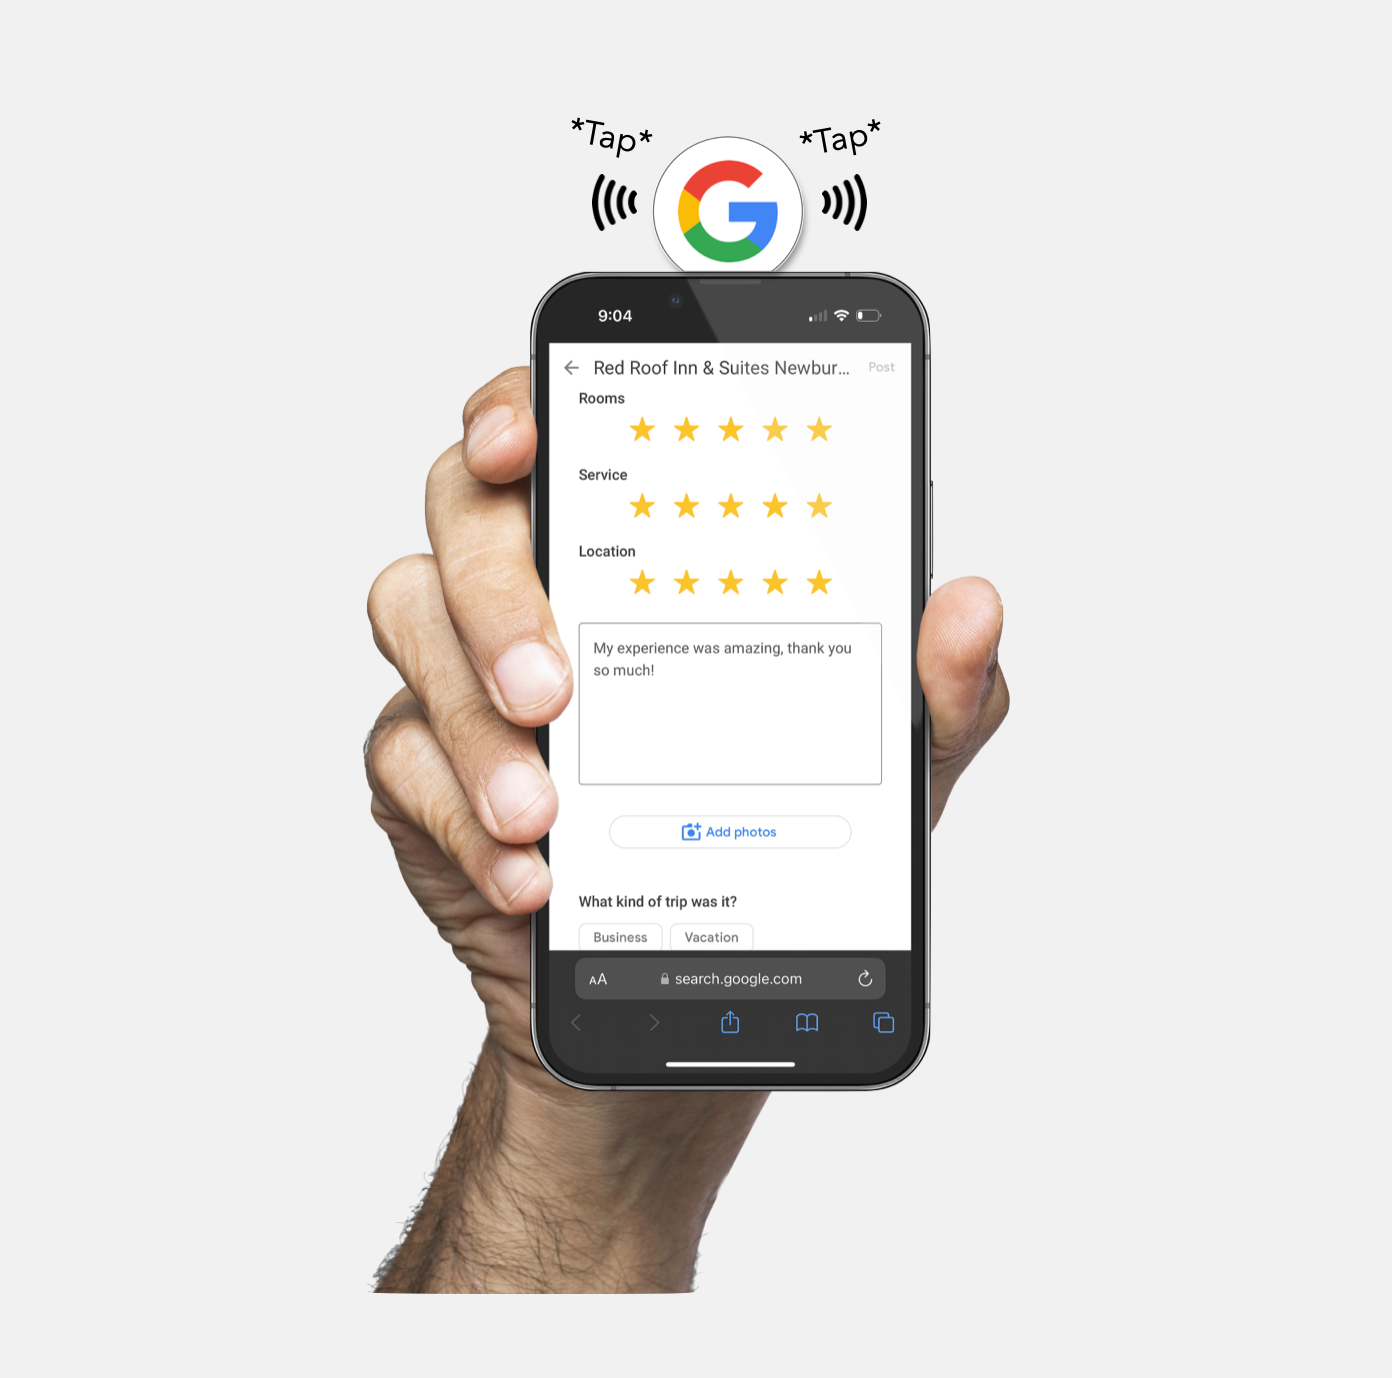
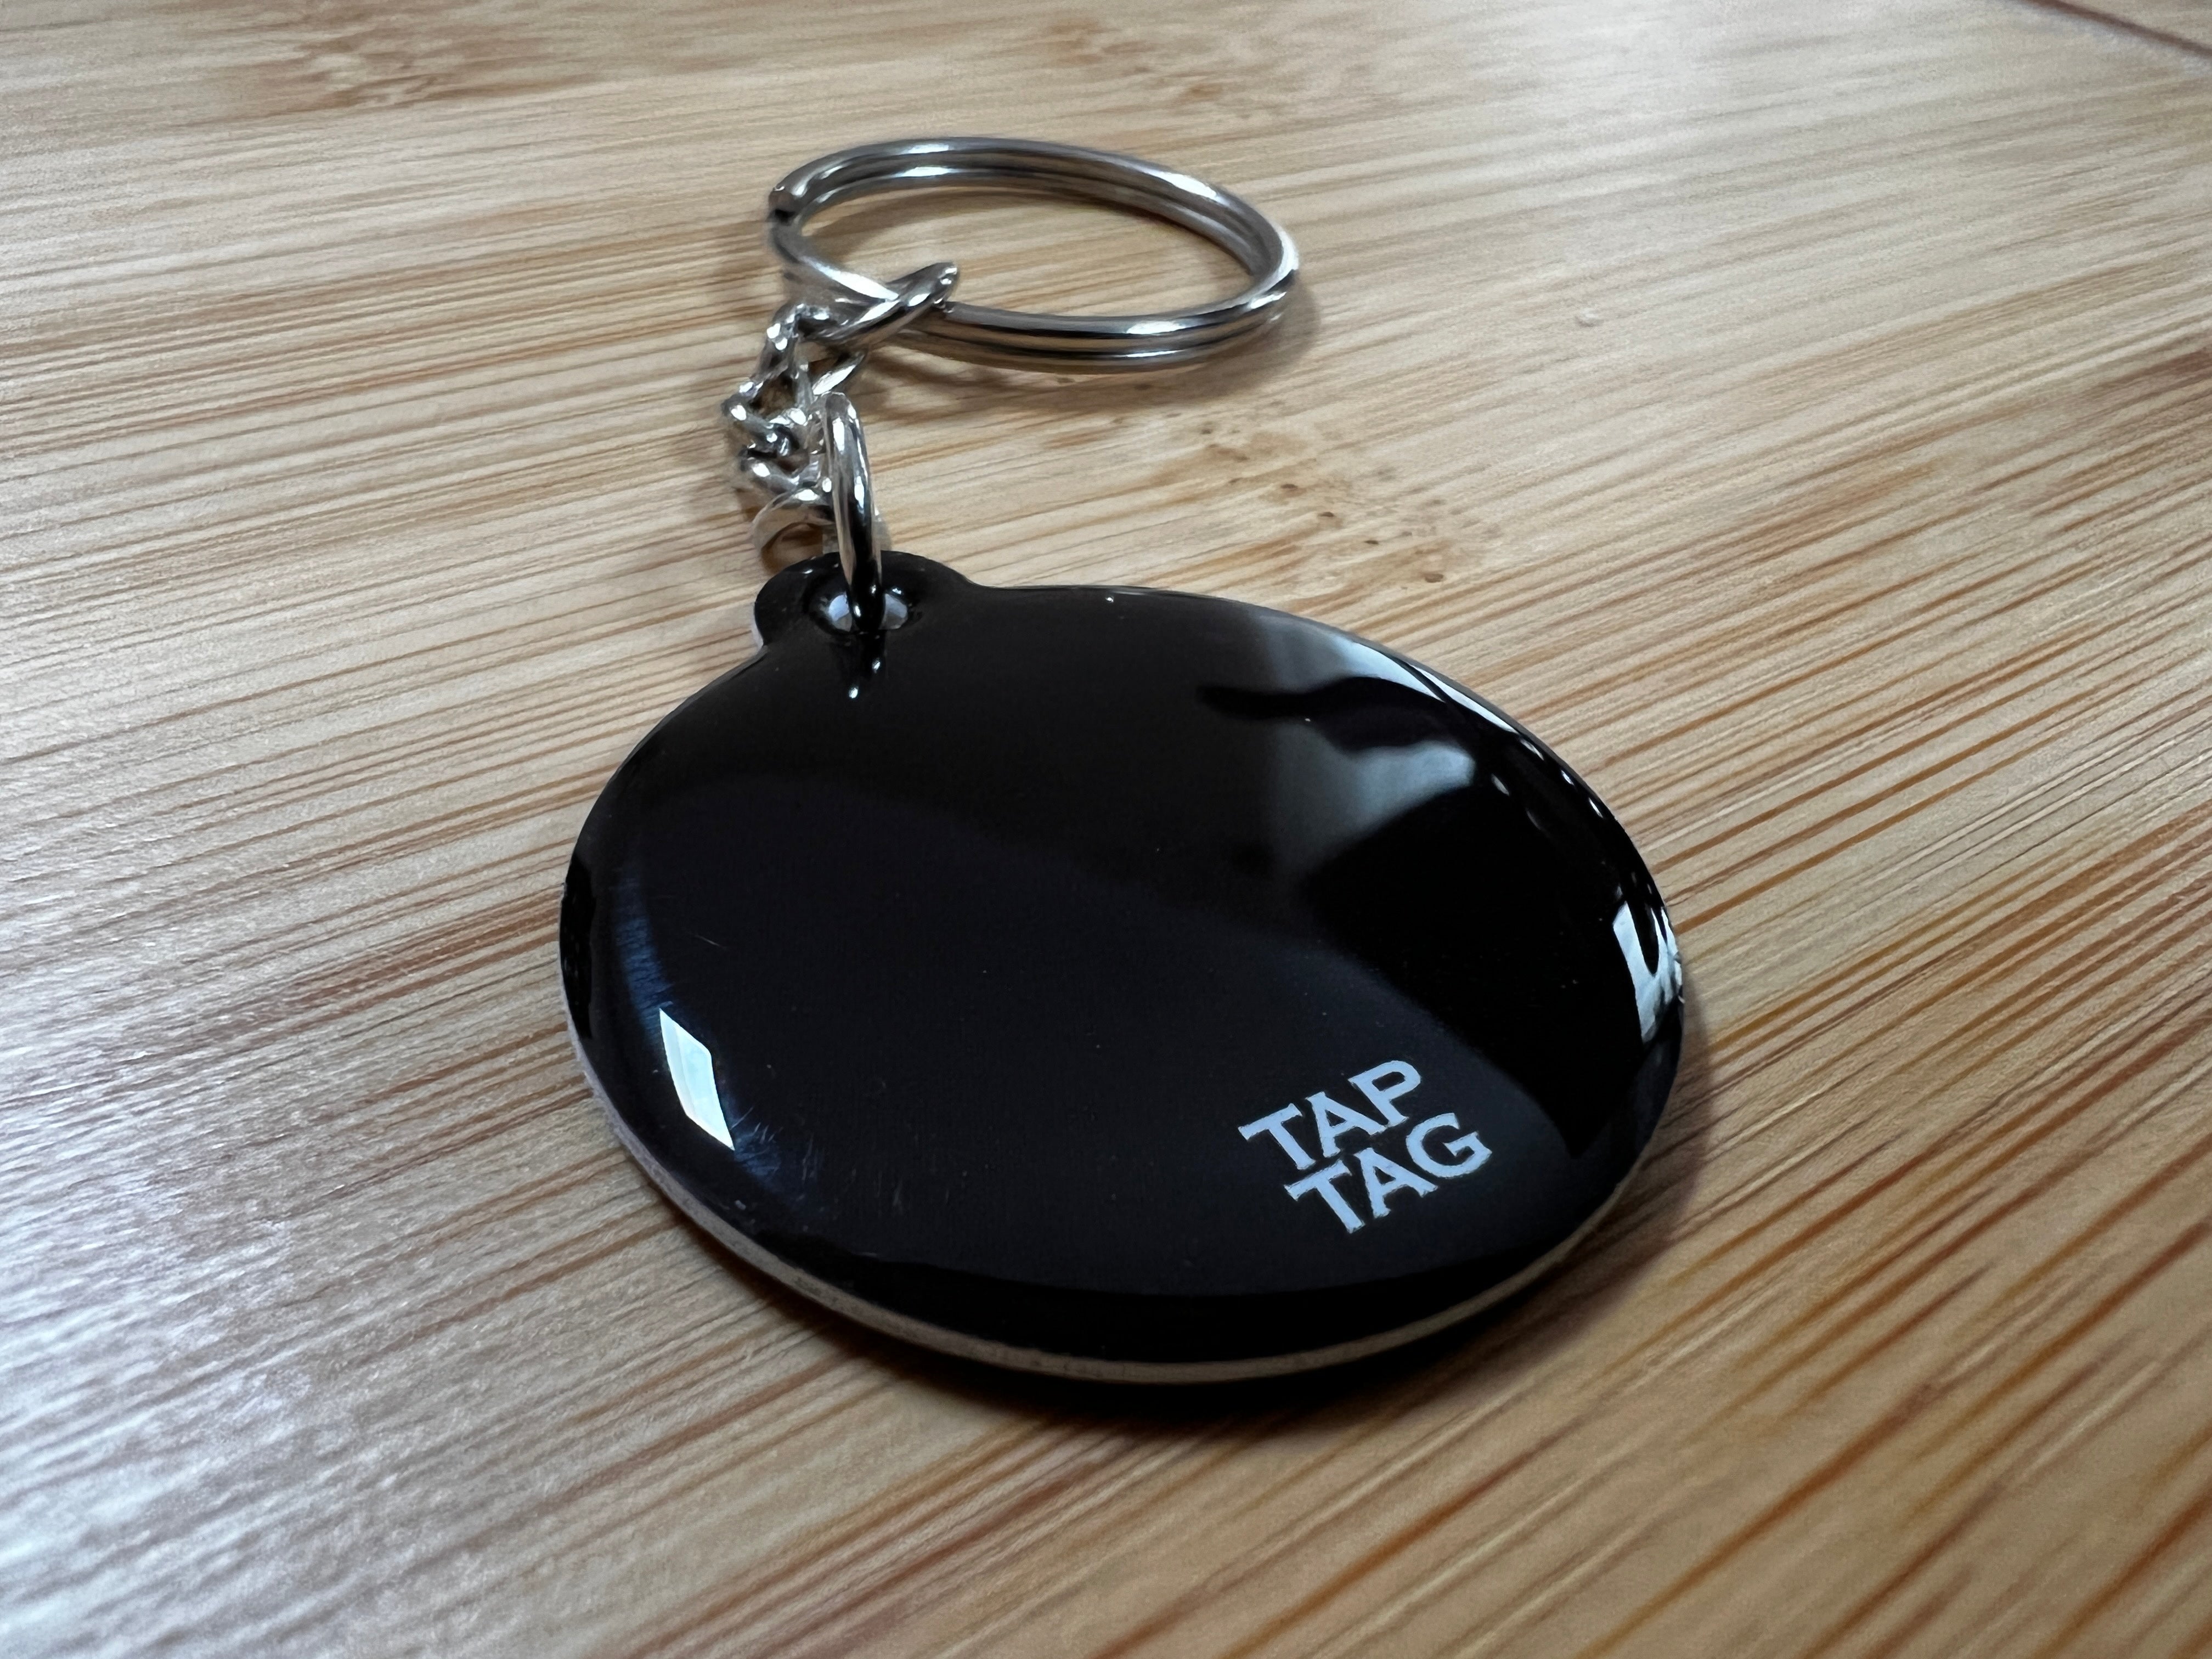
All Tap Tags have the ability to capture reviews on popular review platforms. Follow the steps on this page to scan your Tap Tag and set up its profile.
What is it? A Review profile allows you to add and manage the URL of any review platform like Google, Trustpilot, Tripadvisor, and many more. By setting up your Tap Tag as a review profile, you can easily send clients to any review page of choice.
The landing page destination is fully customizable, and can be managed in realtime from any device. Editing your profile updates all connected Tap Tag products in unison.

Tips:
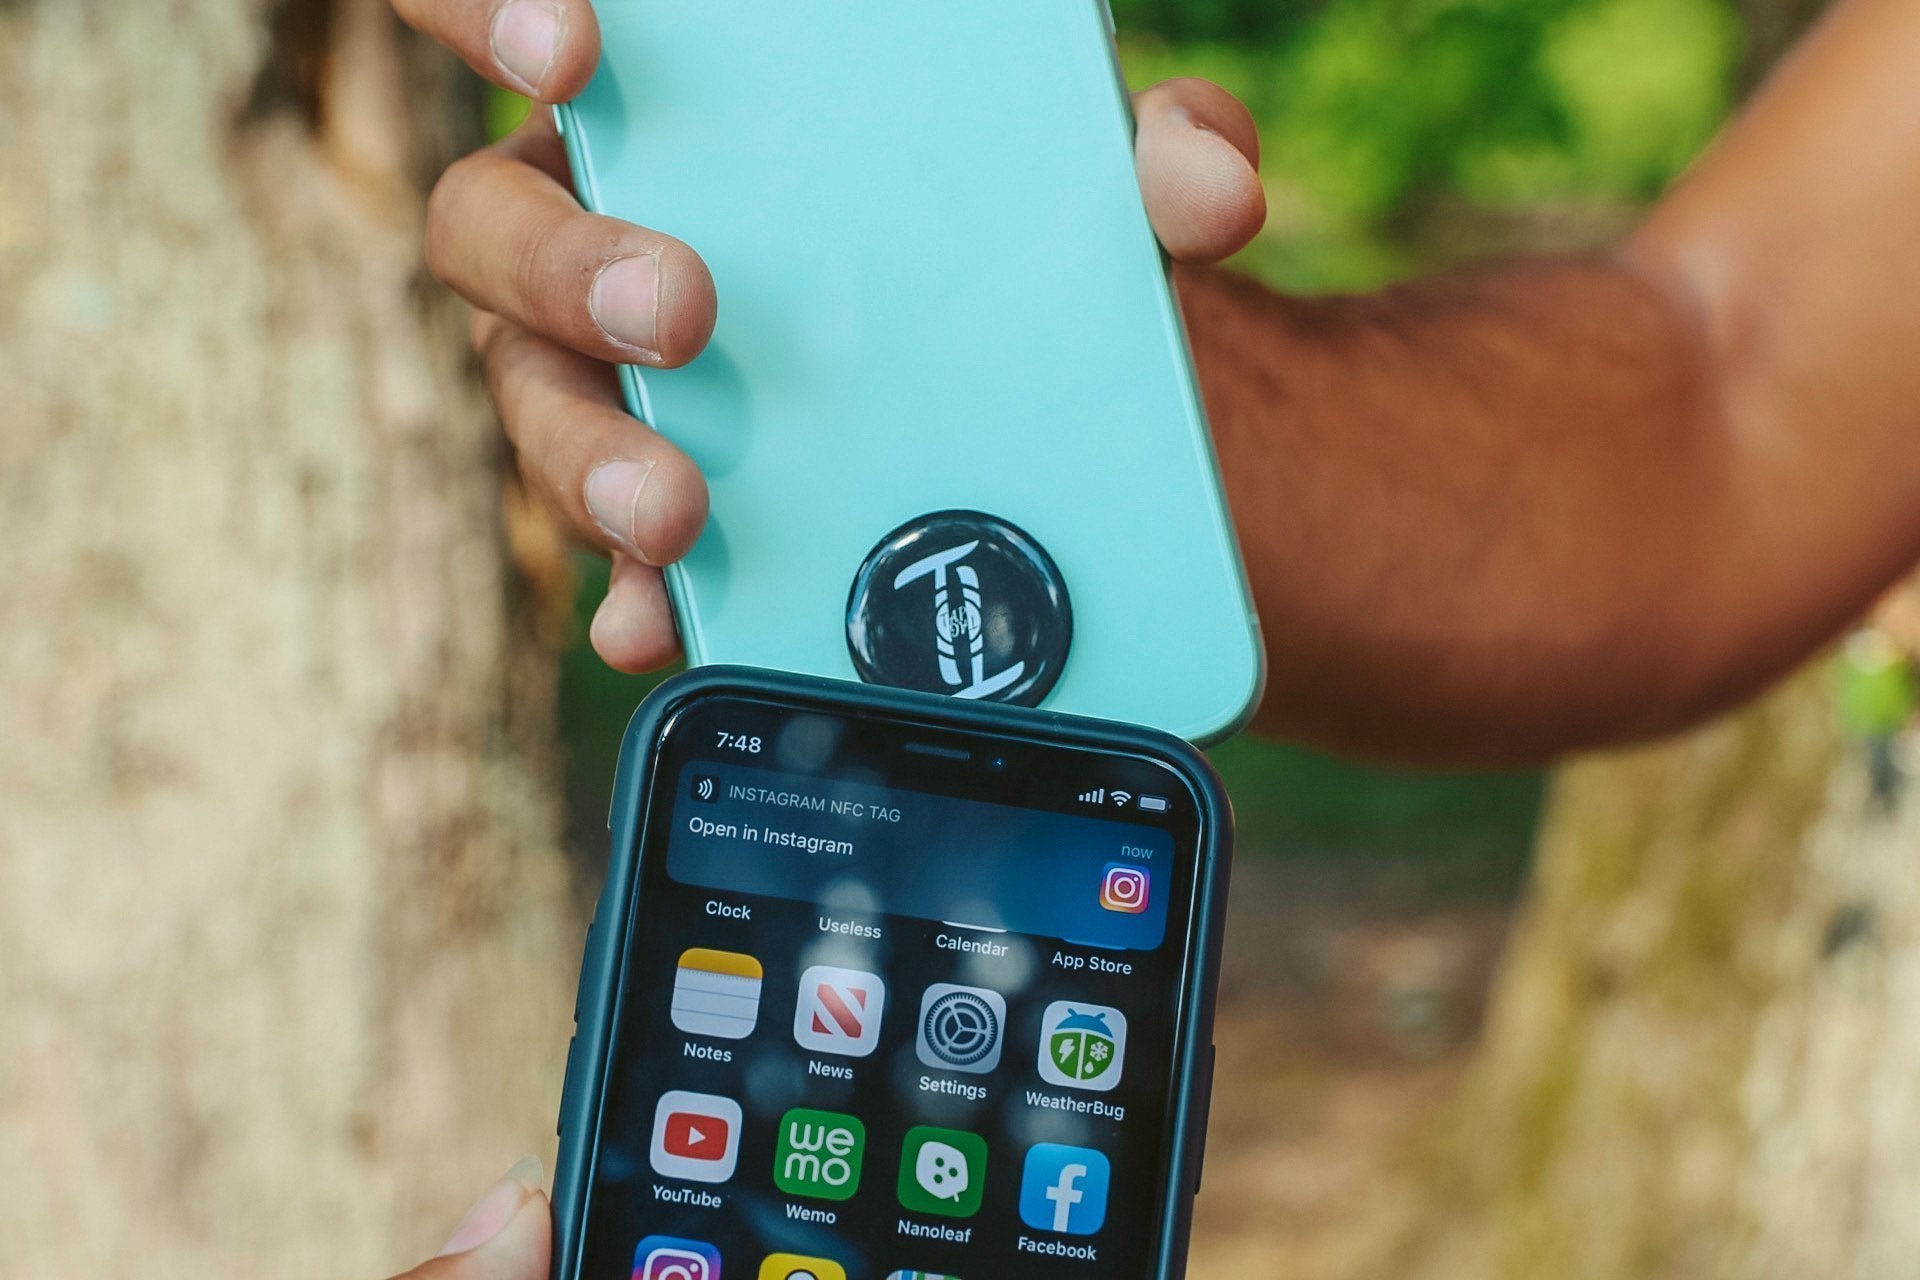
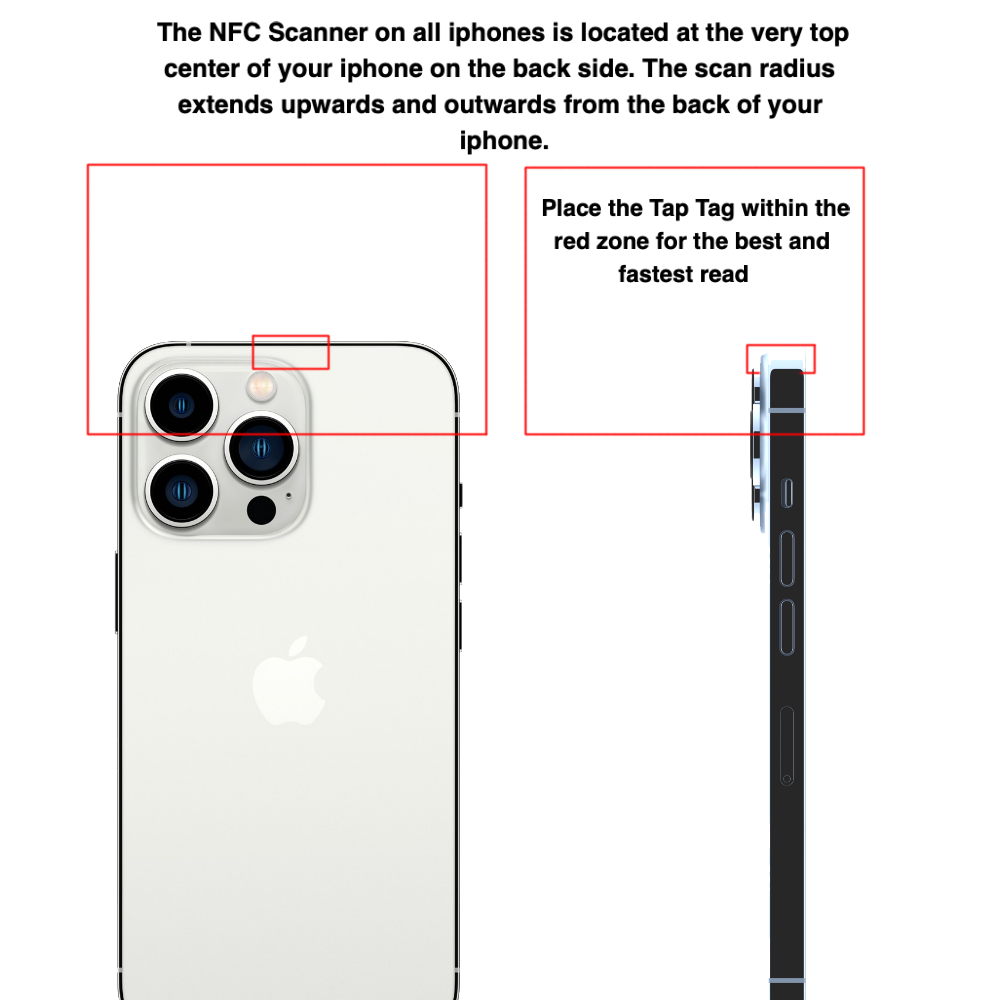
- View the image to ensure your are holding the Tap Tag in the right spot on your smartphone.
- Make sure your screen is unlocked
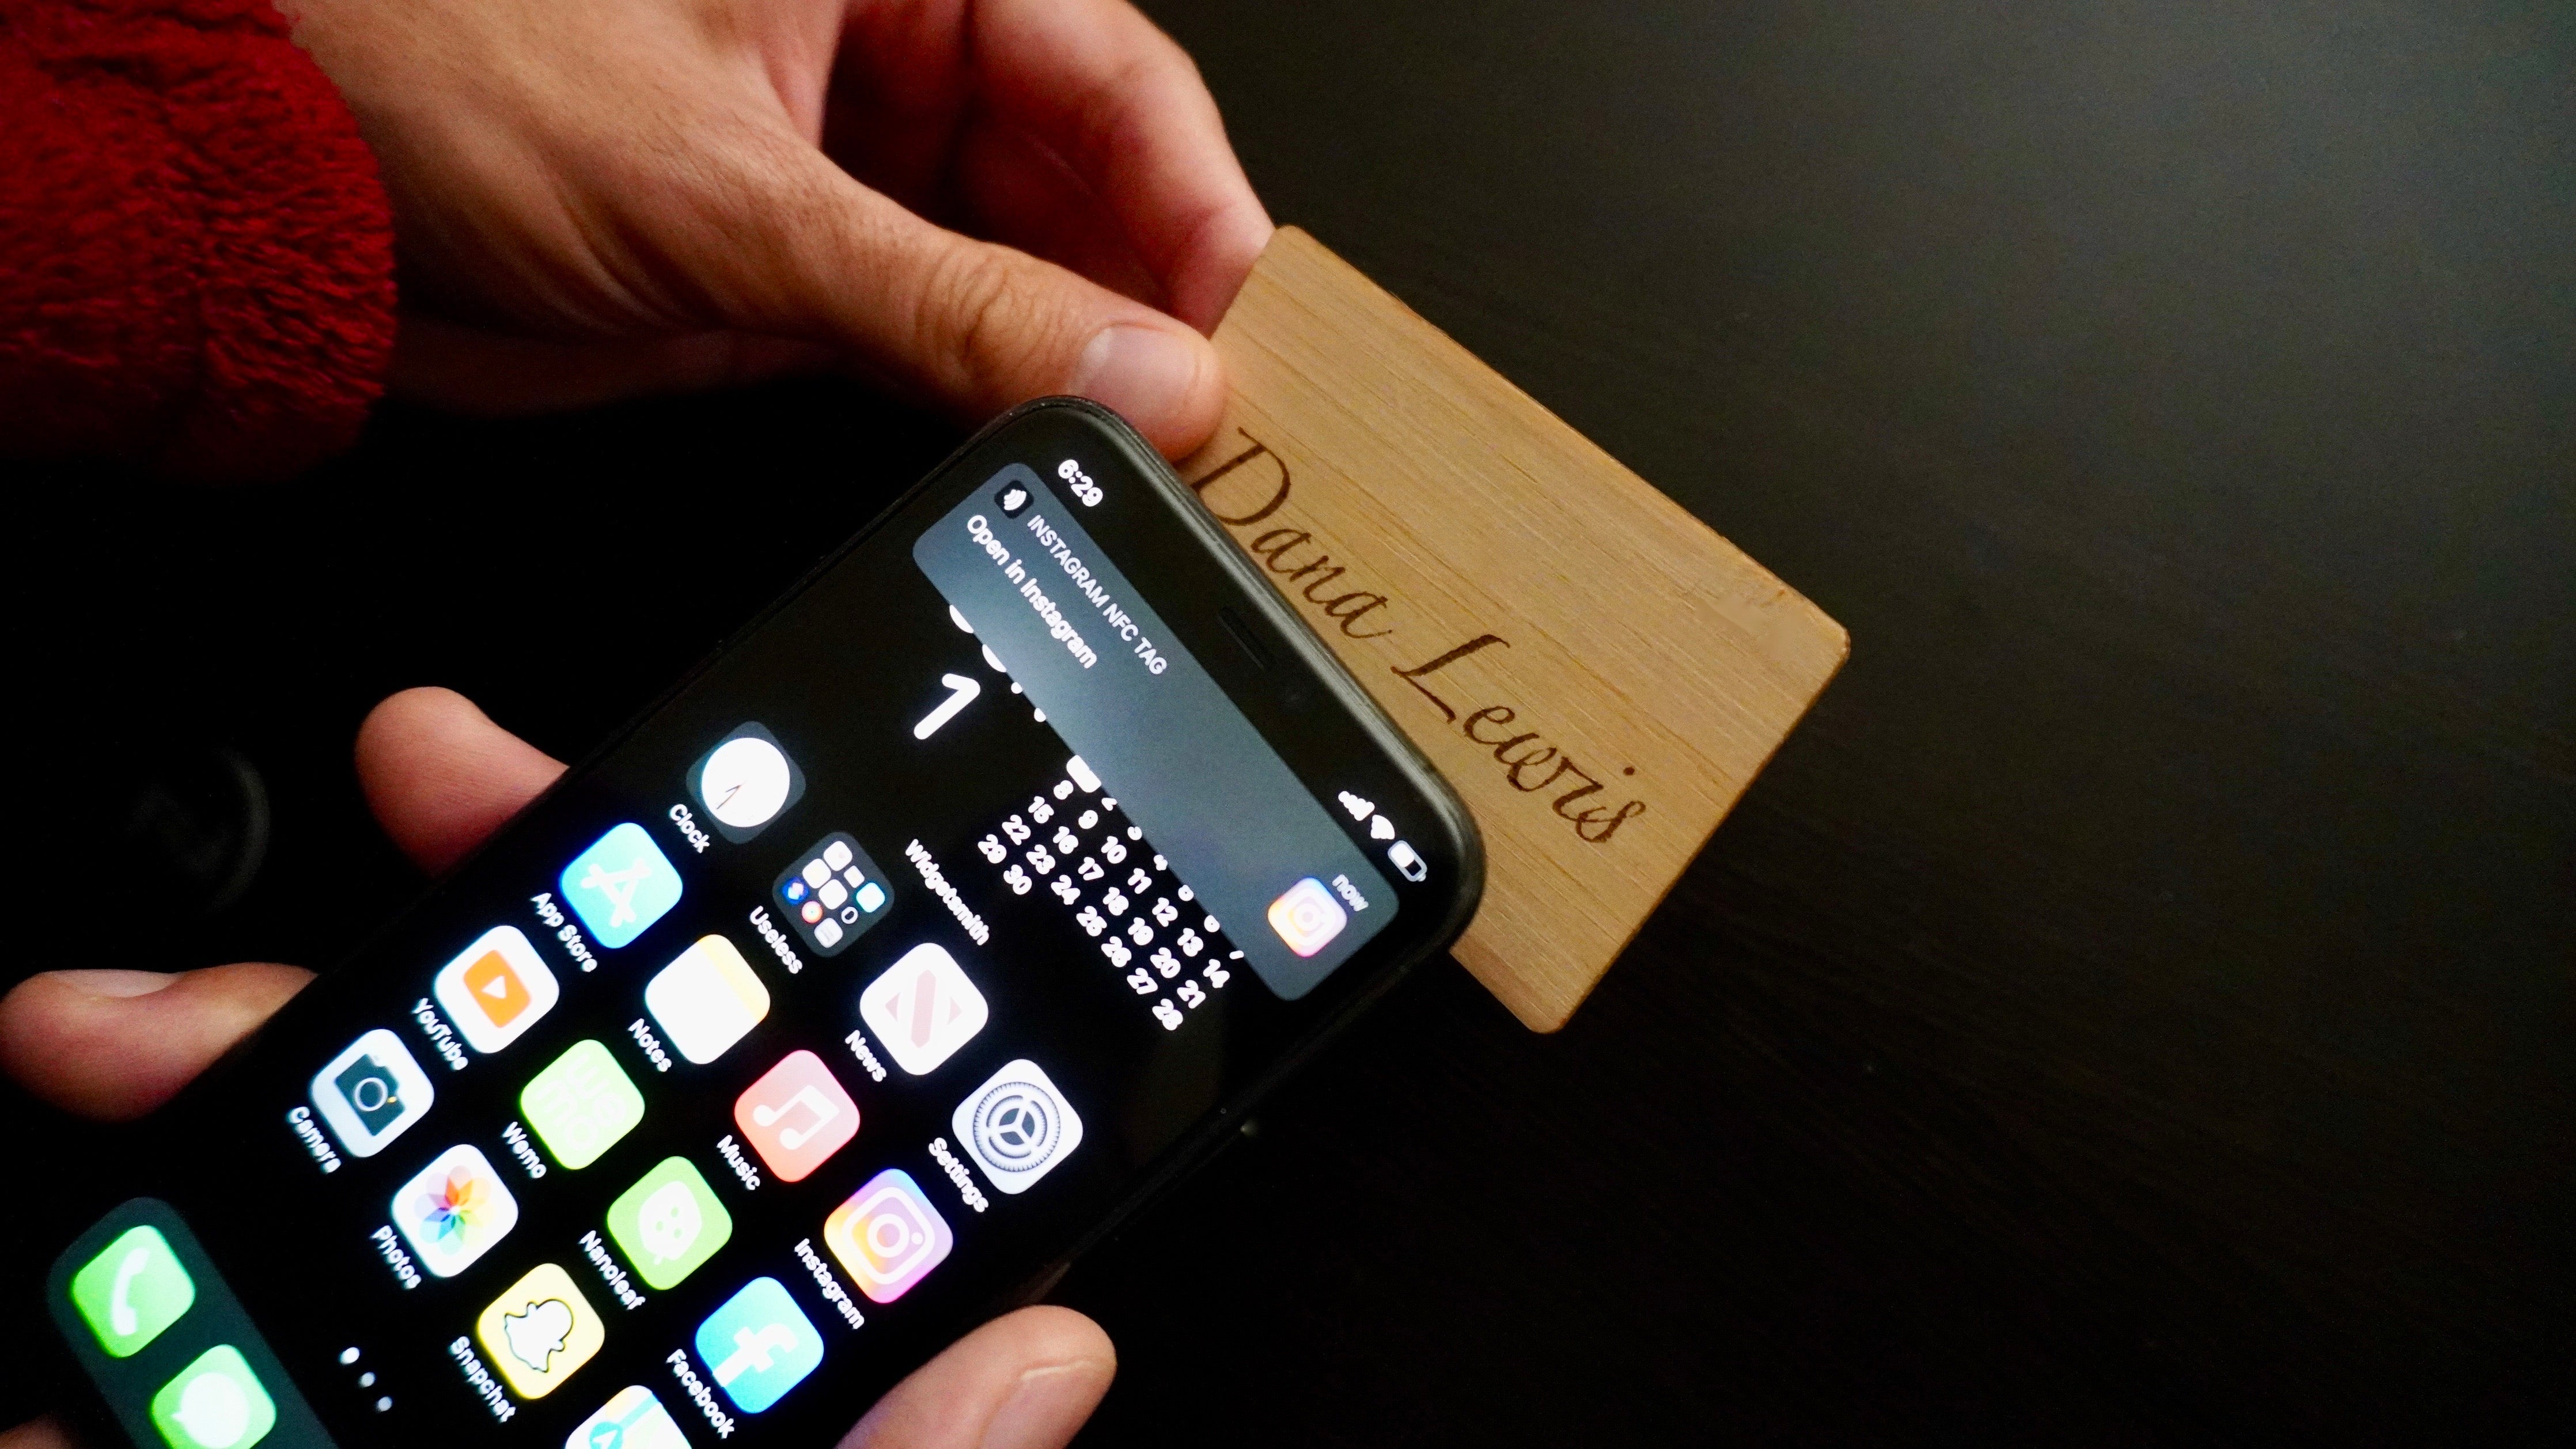
- Hold Tap Tag in the scan area for at least one second
- For android phones, ensure NFC is turned ON in settings (near bluetooth and wifi)
- Metal Cards scan from the backside only where the chip is exposed
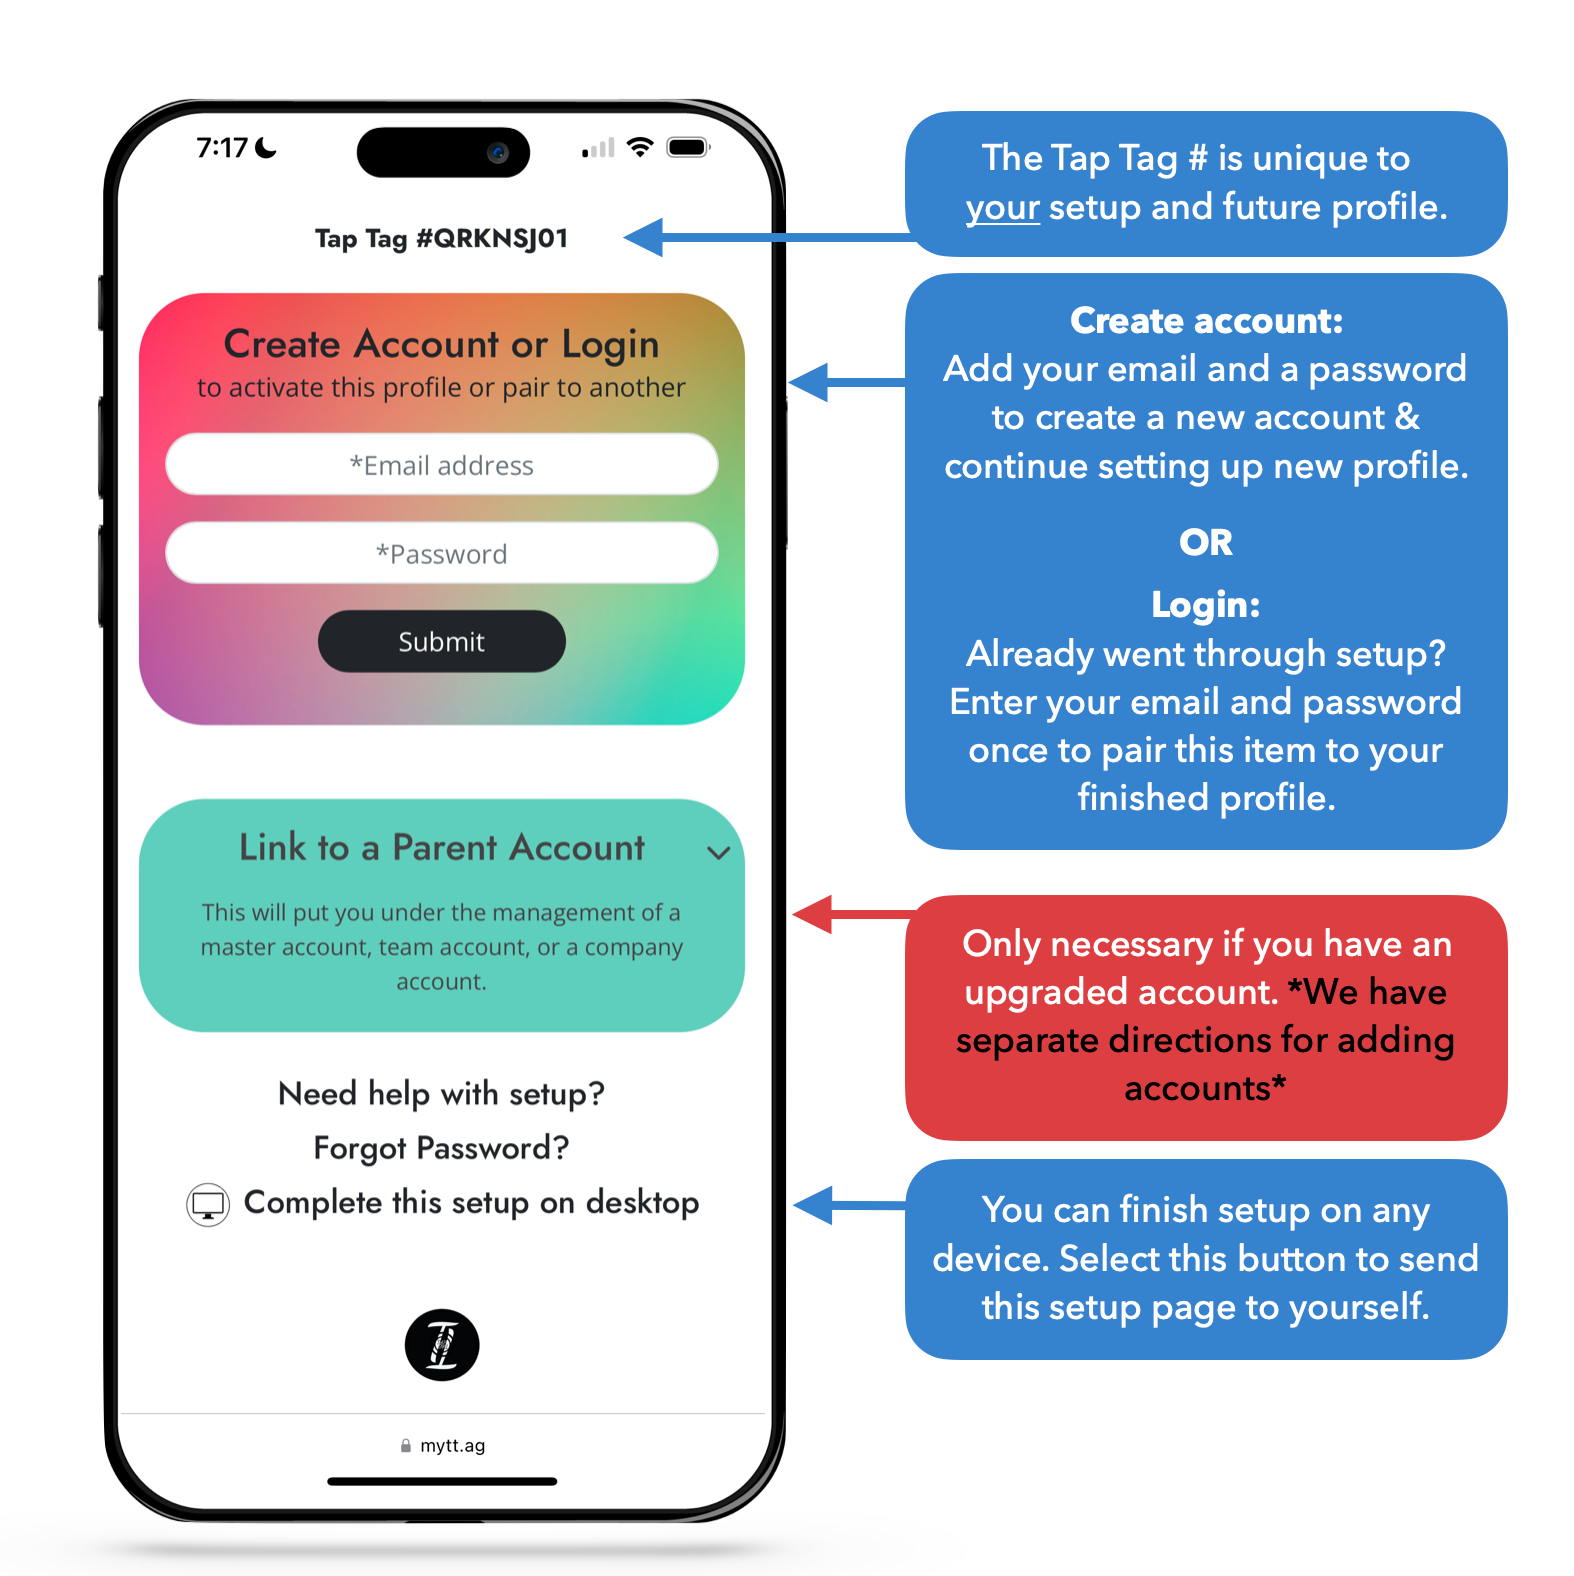
Every Tap Tag comes in setup mode. To enter setup mode scan your item by tapping or scanning its QR code (if it has one).
When your Tap Tag(s) arrive you can choose to setup as individual accounts, or set up one and pair others to it.
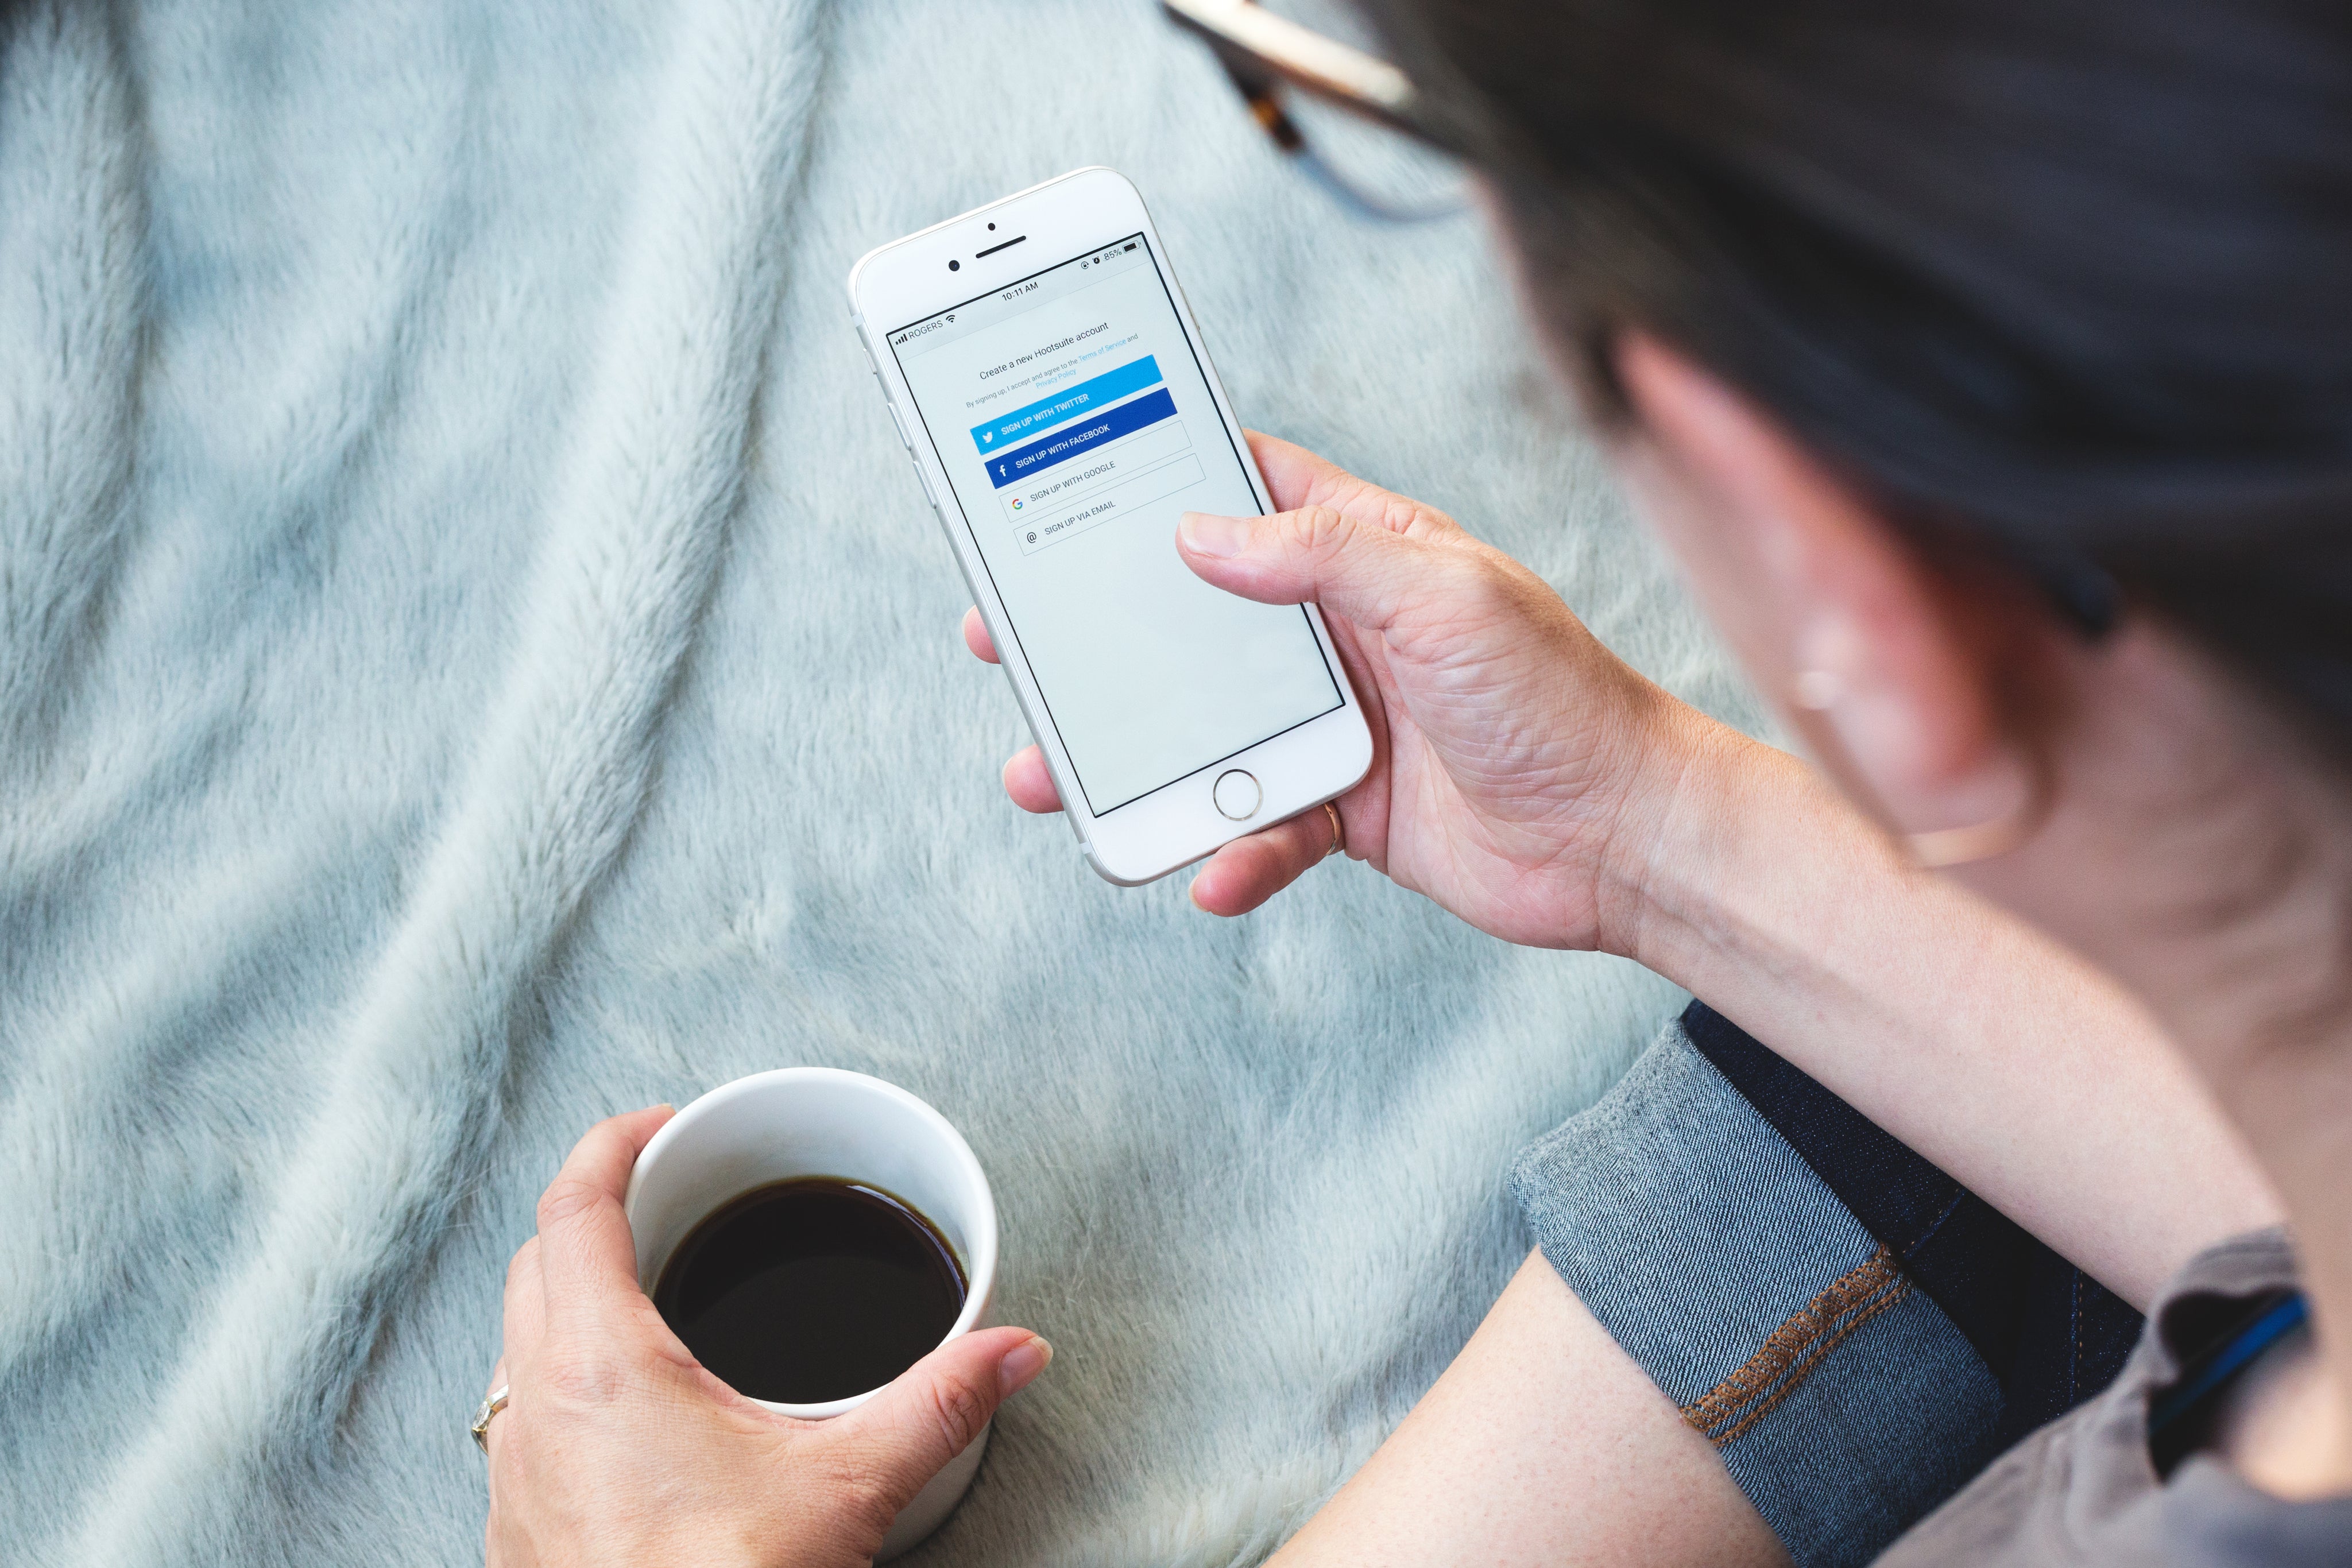
Enter an email and password into the first field to start setup.
Okay, this page is 🍰. Next!
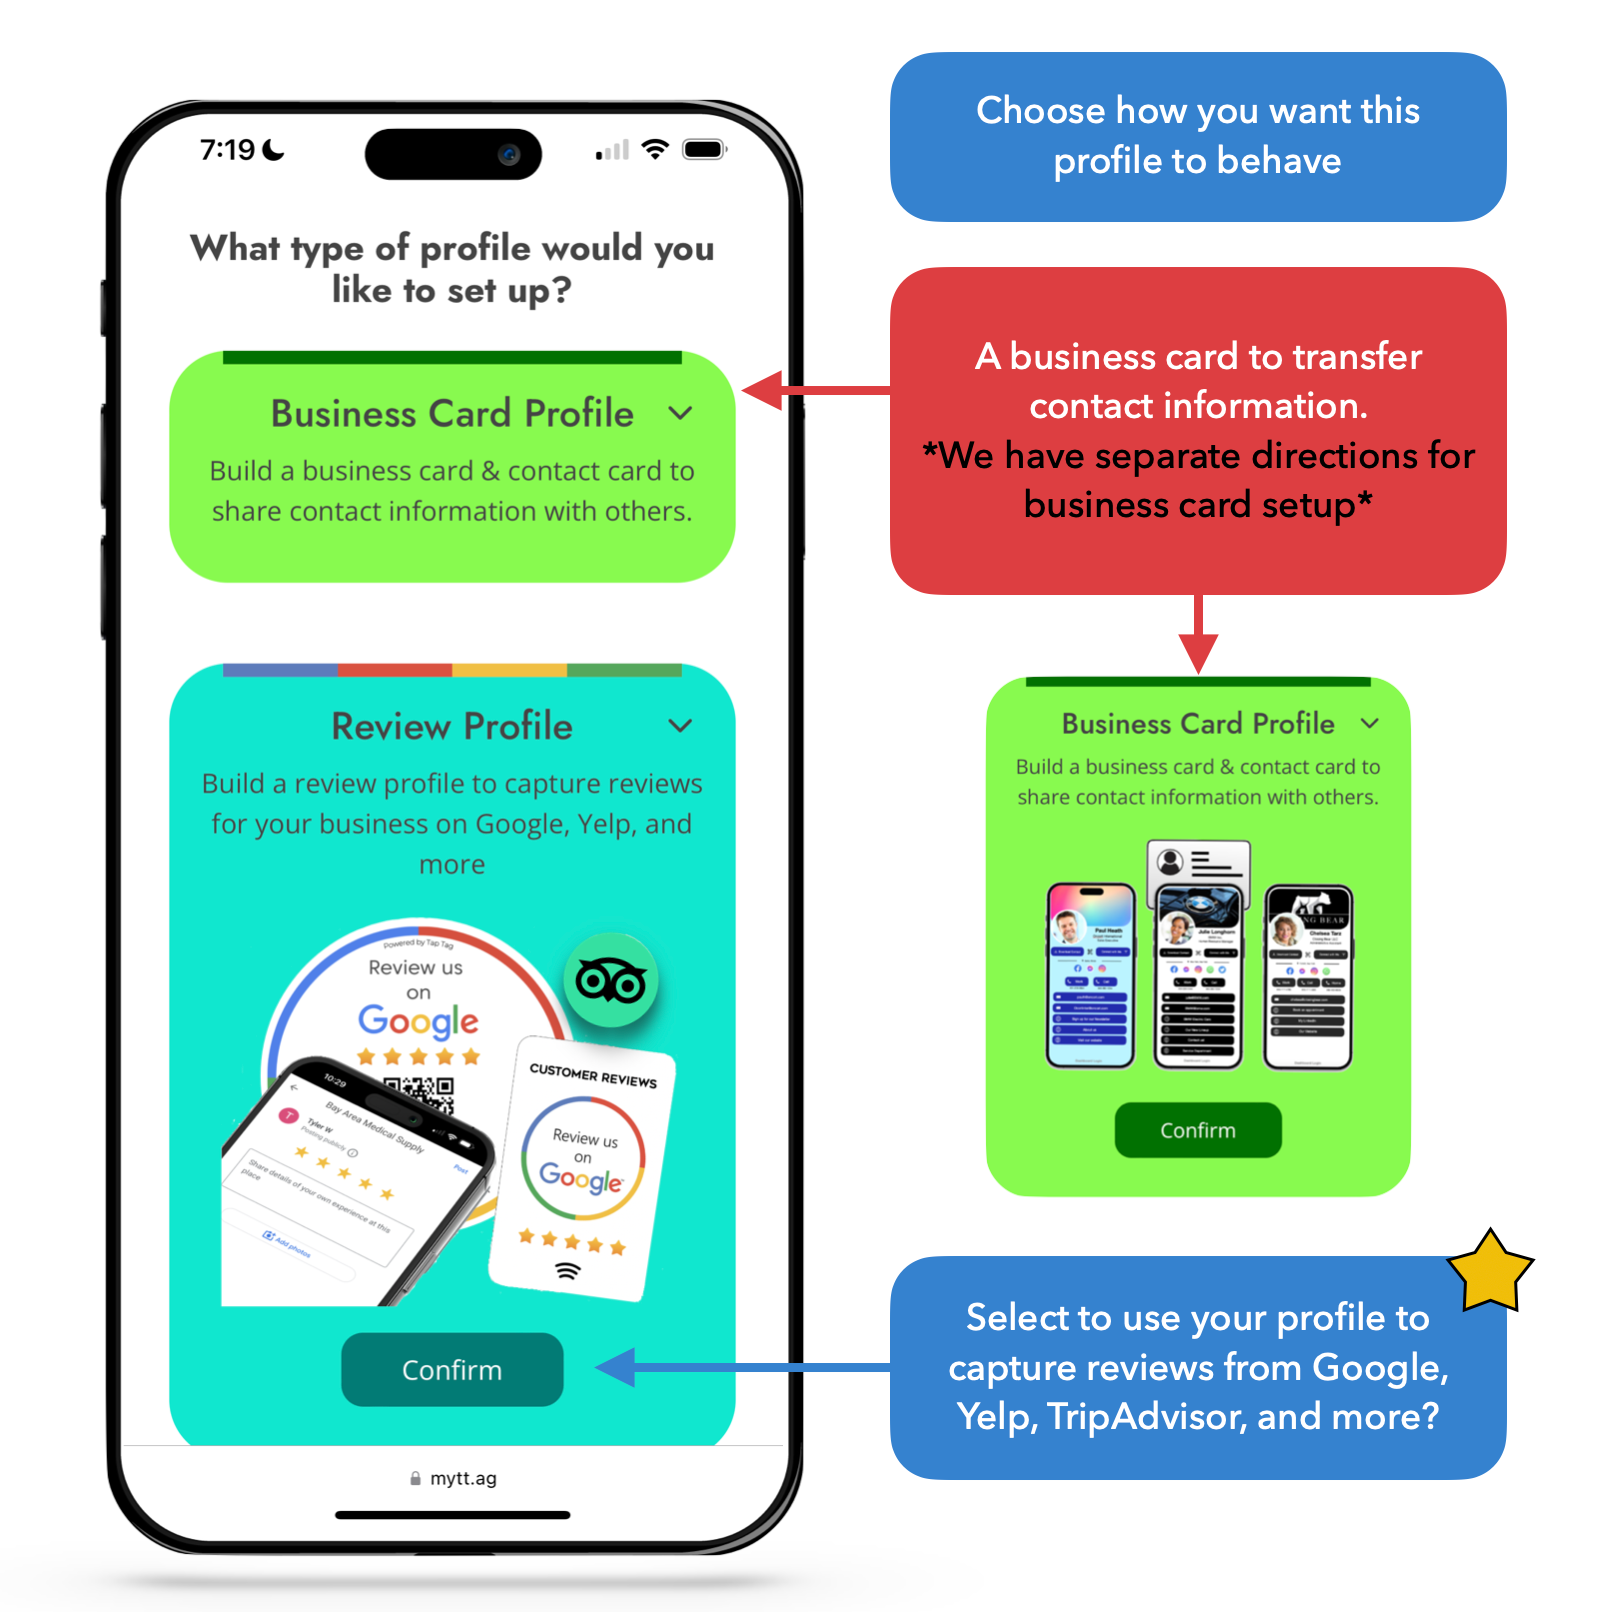
We offer two different systems that your Tap Tag can run off of, choose the second that says "Review Profile."
Digital Business Card platform: For those that want to use their Tap Tag like a business card. Clients that scan your Tap Tag will be able to save your contact information into their phone, view your socials, websites, and more.
Review Capture platform: For those that want to capture reviews for their business from Google, TrustPilot, TripAdvisor or any other review platforms.
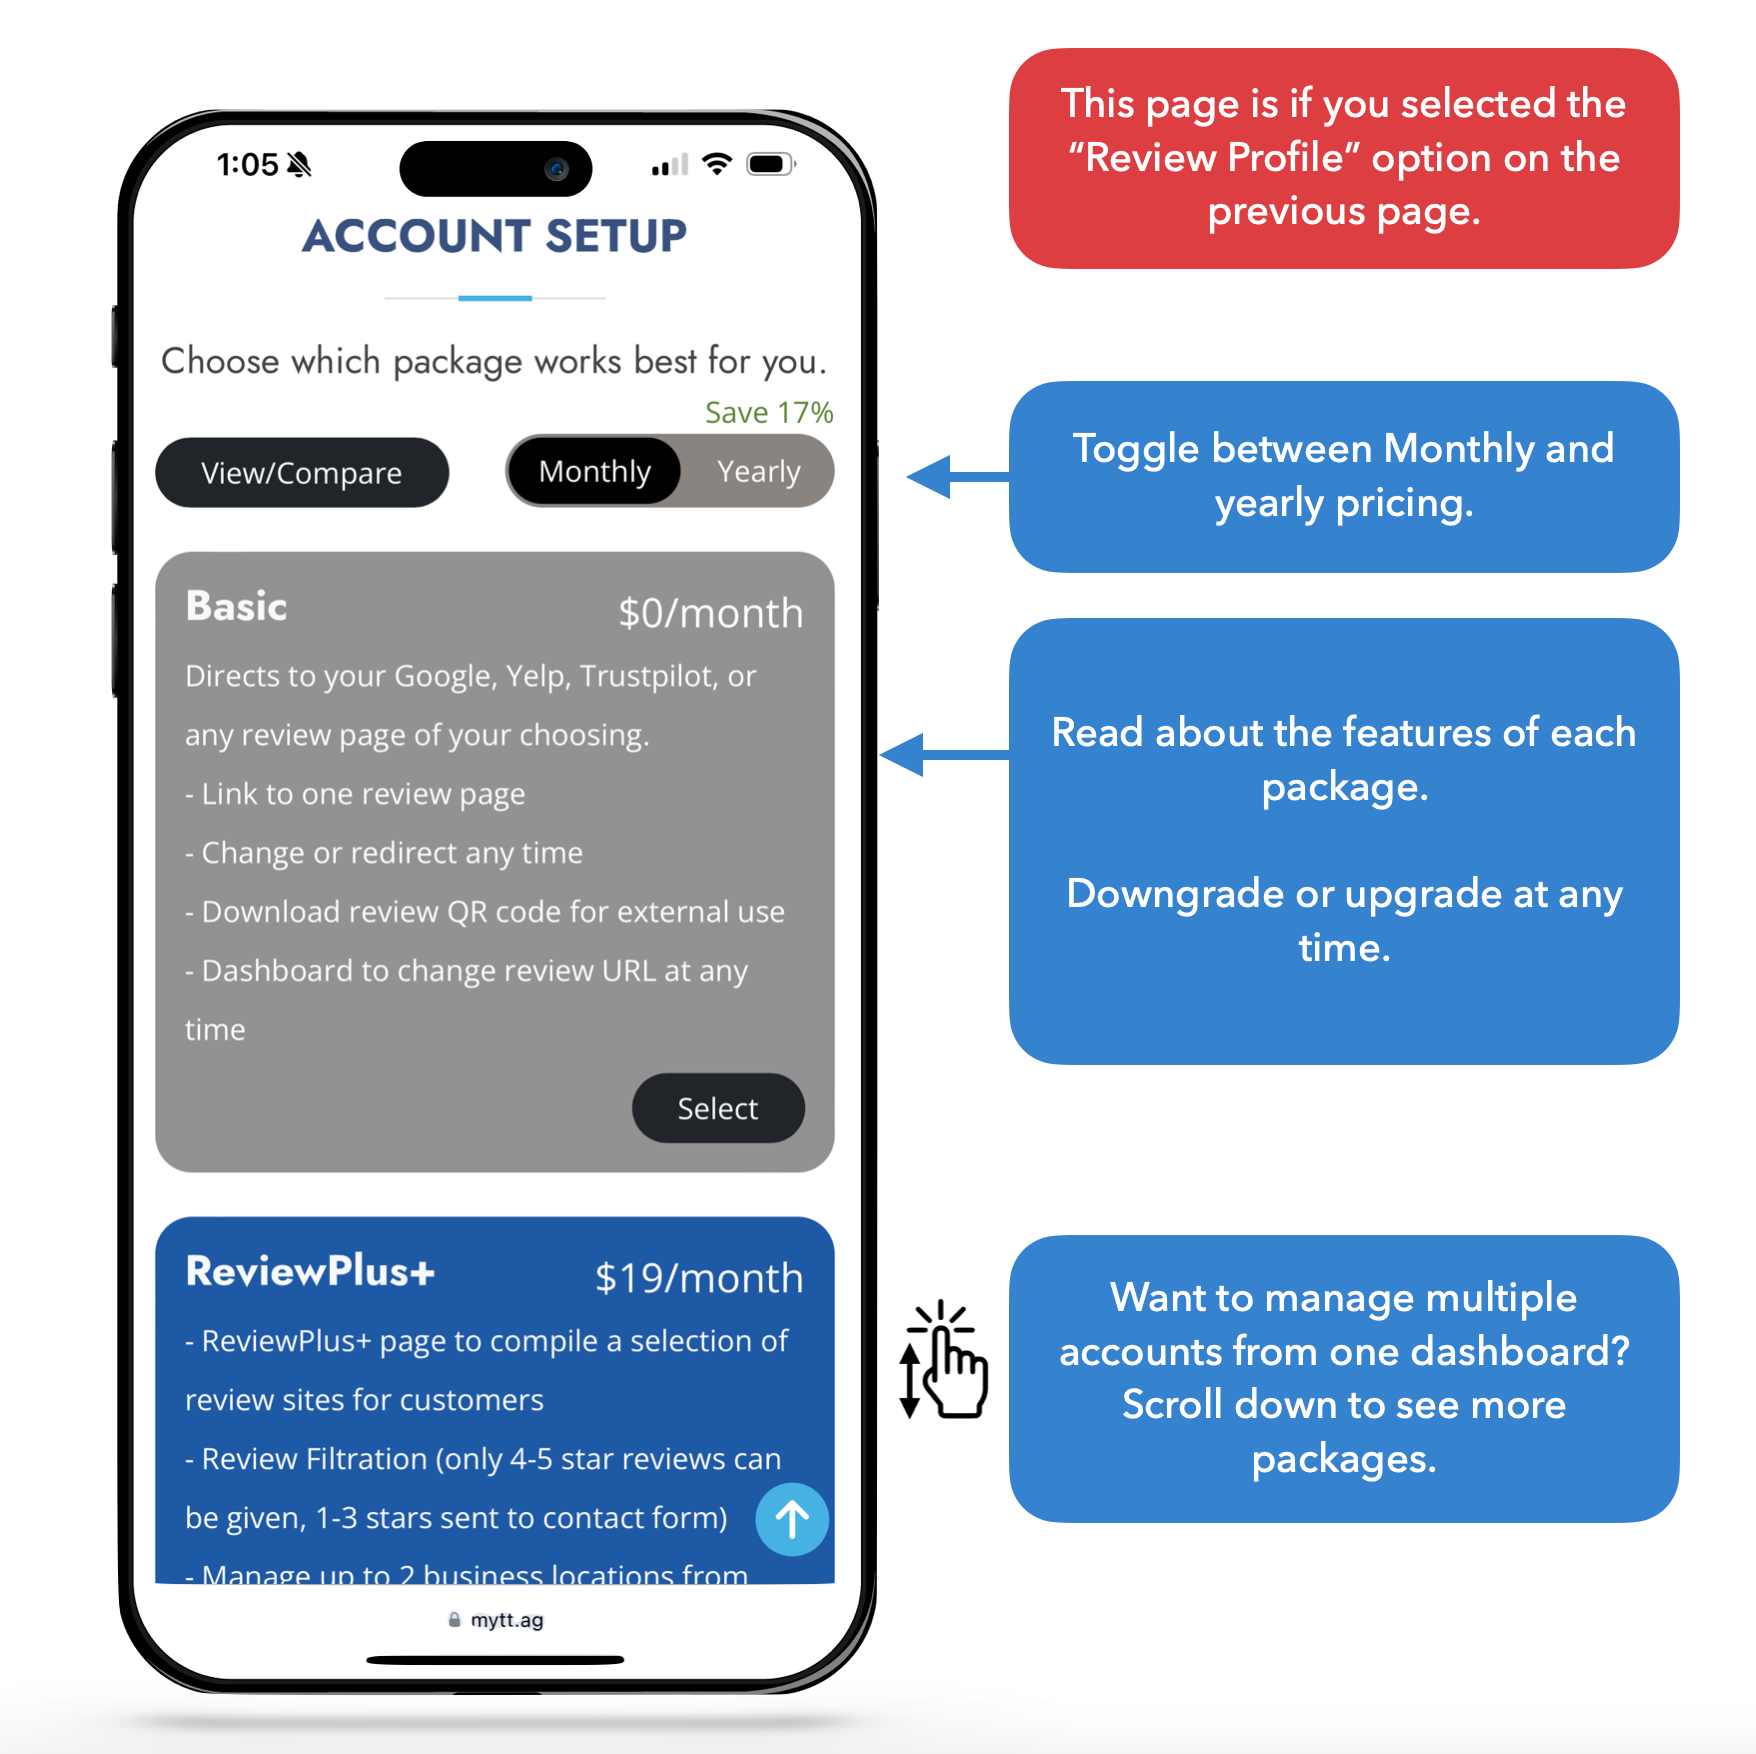
Take a moment to read through the features we offer. More information below.
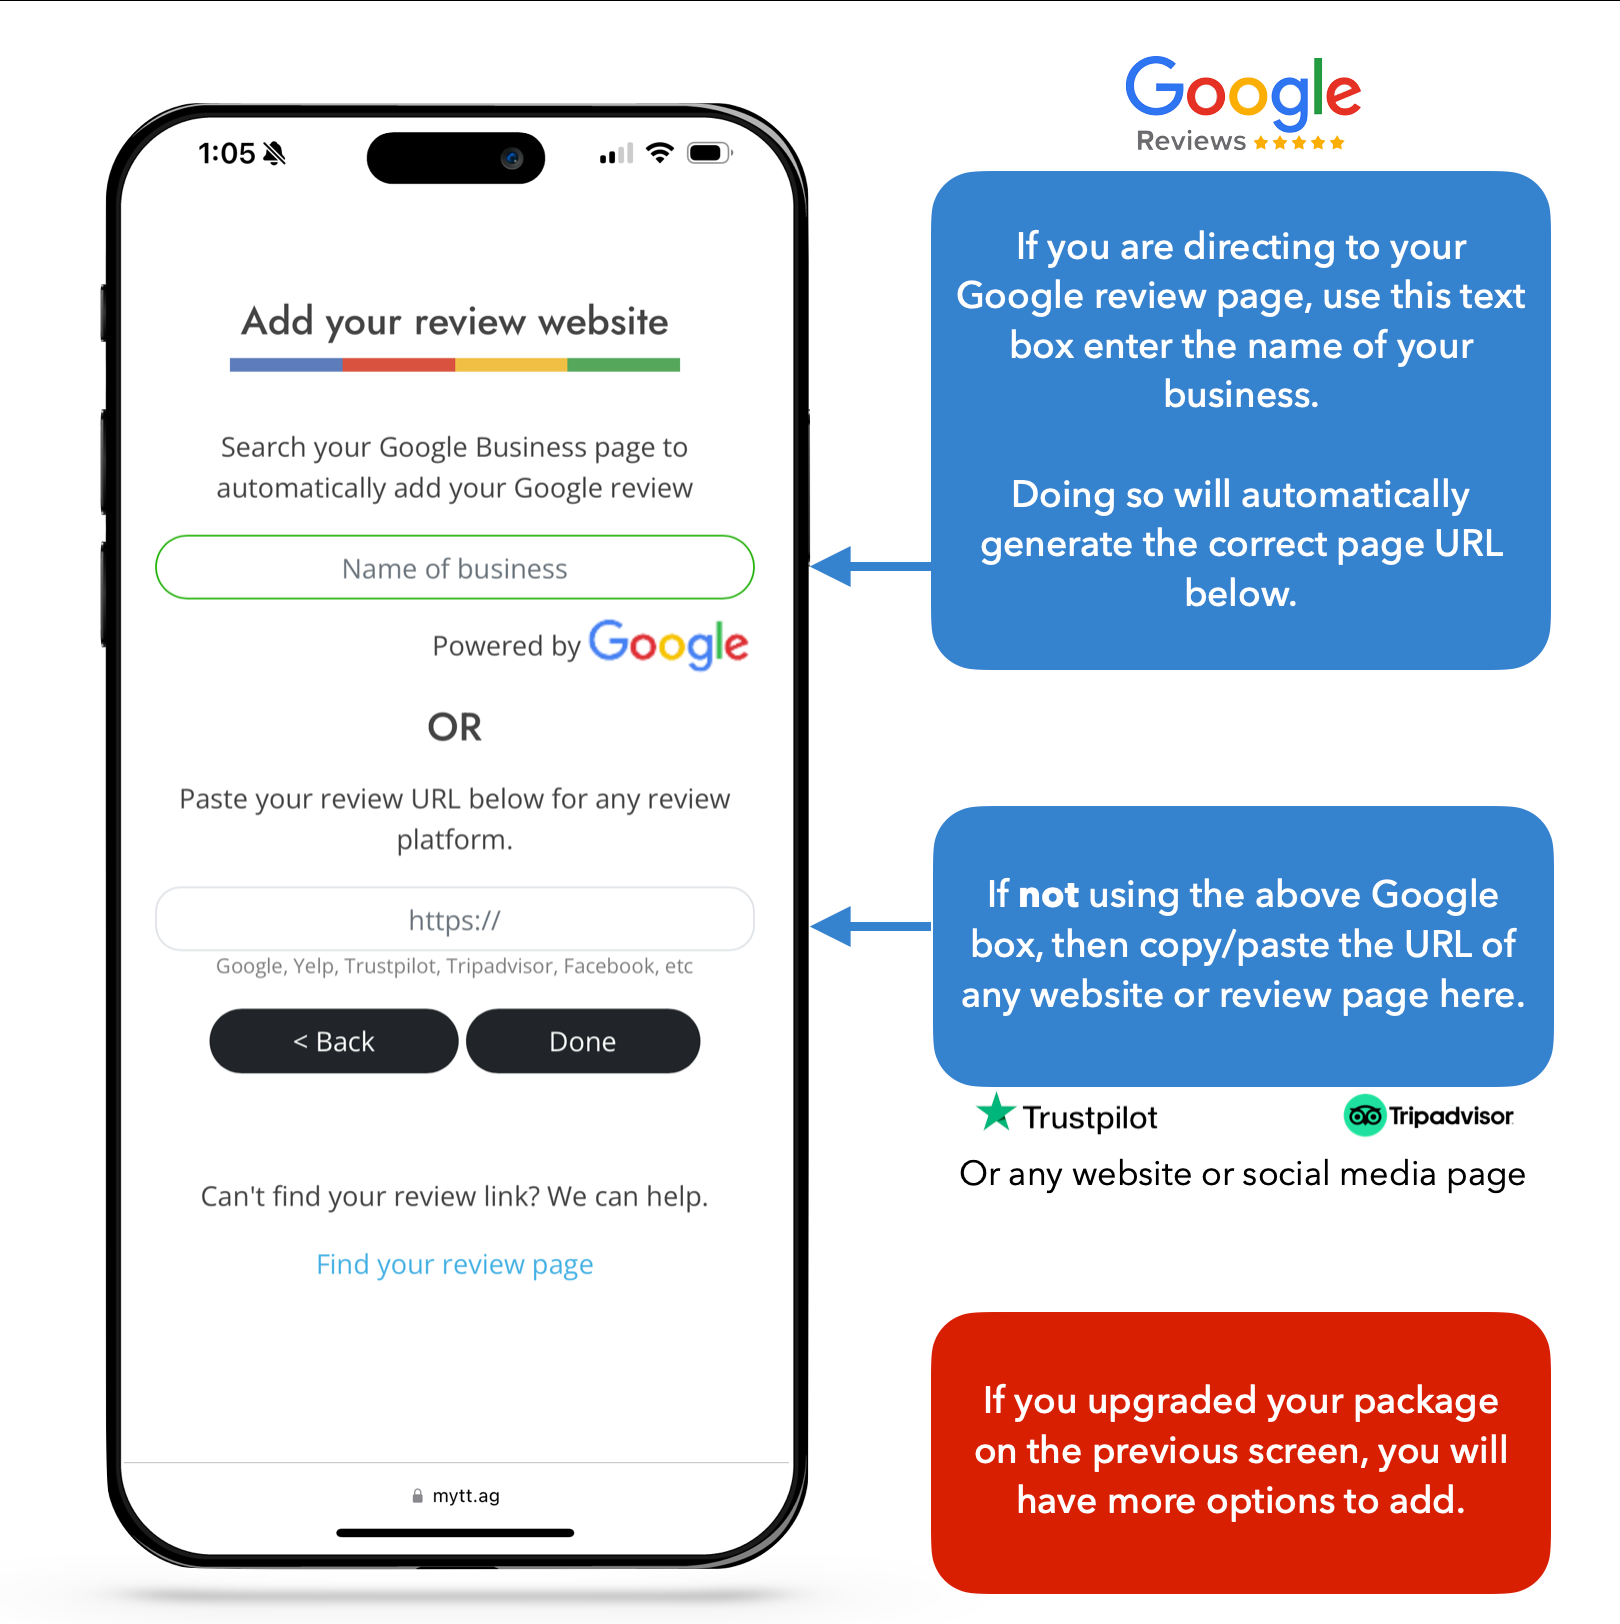
Here you will choose what clients see when your Tap Tag is scanned.
We integrate directly with Google, so if you want to add your Google review page type the name of your business into the first box and select the correct location from the dropdown.
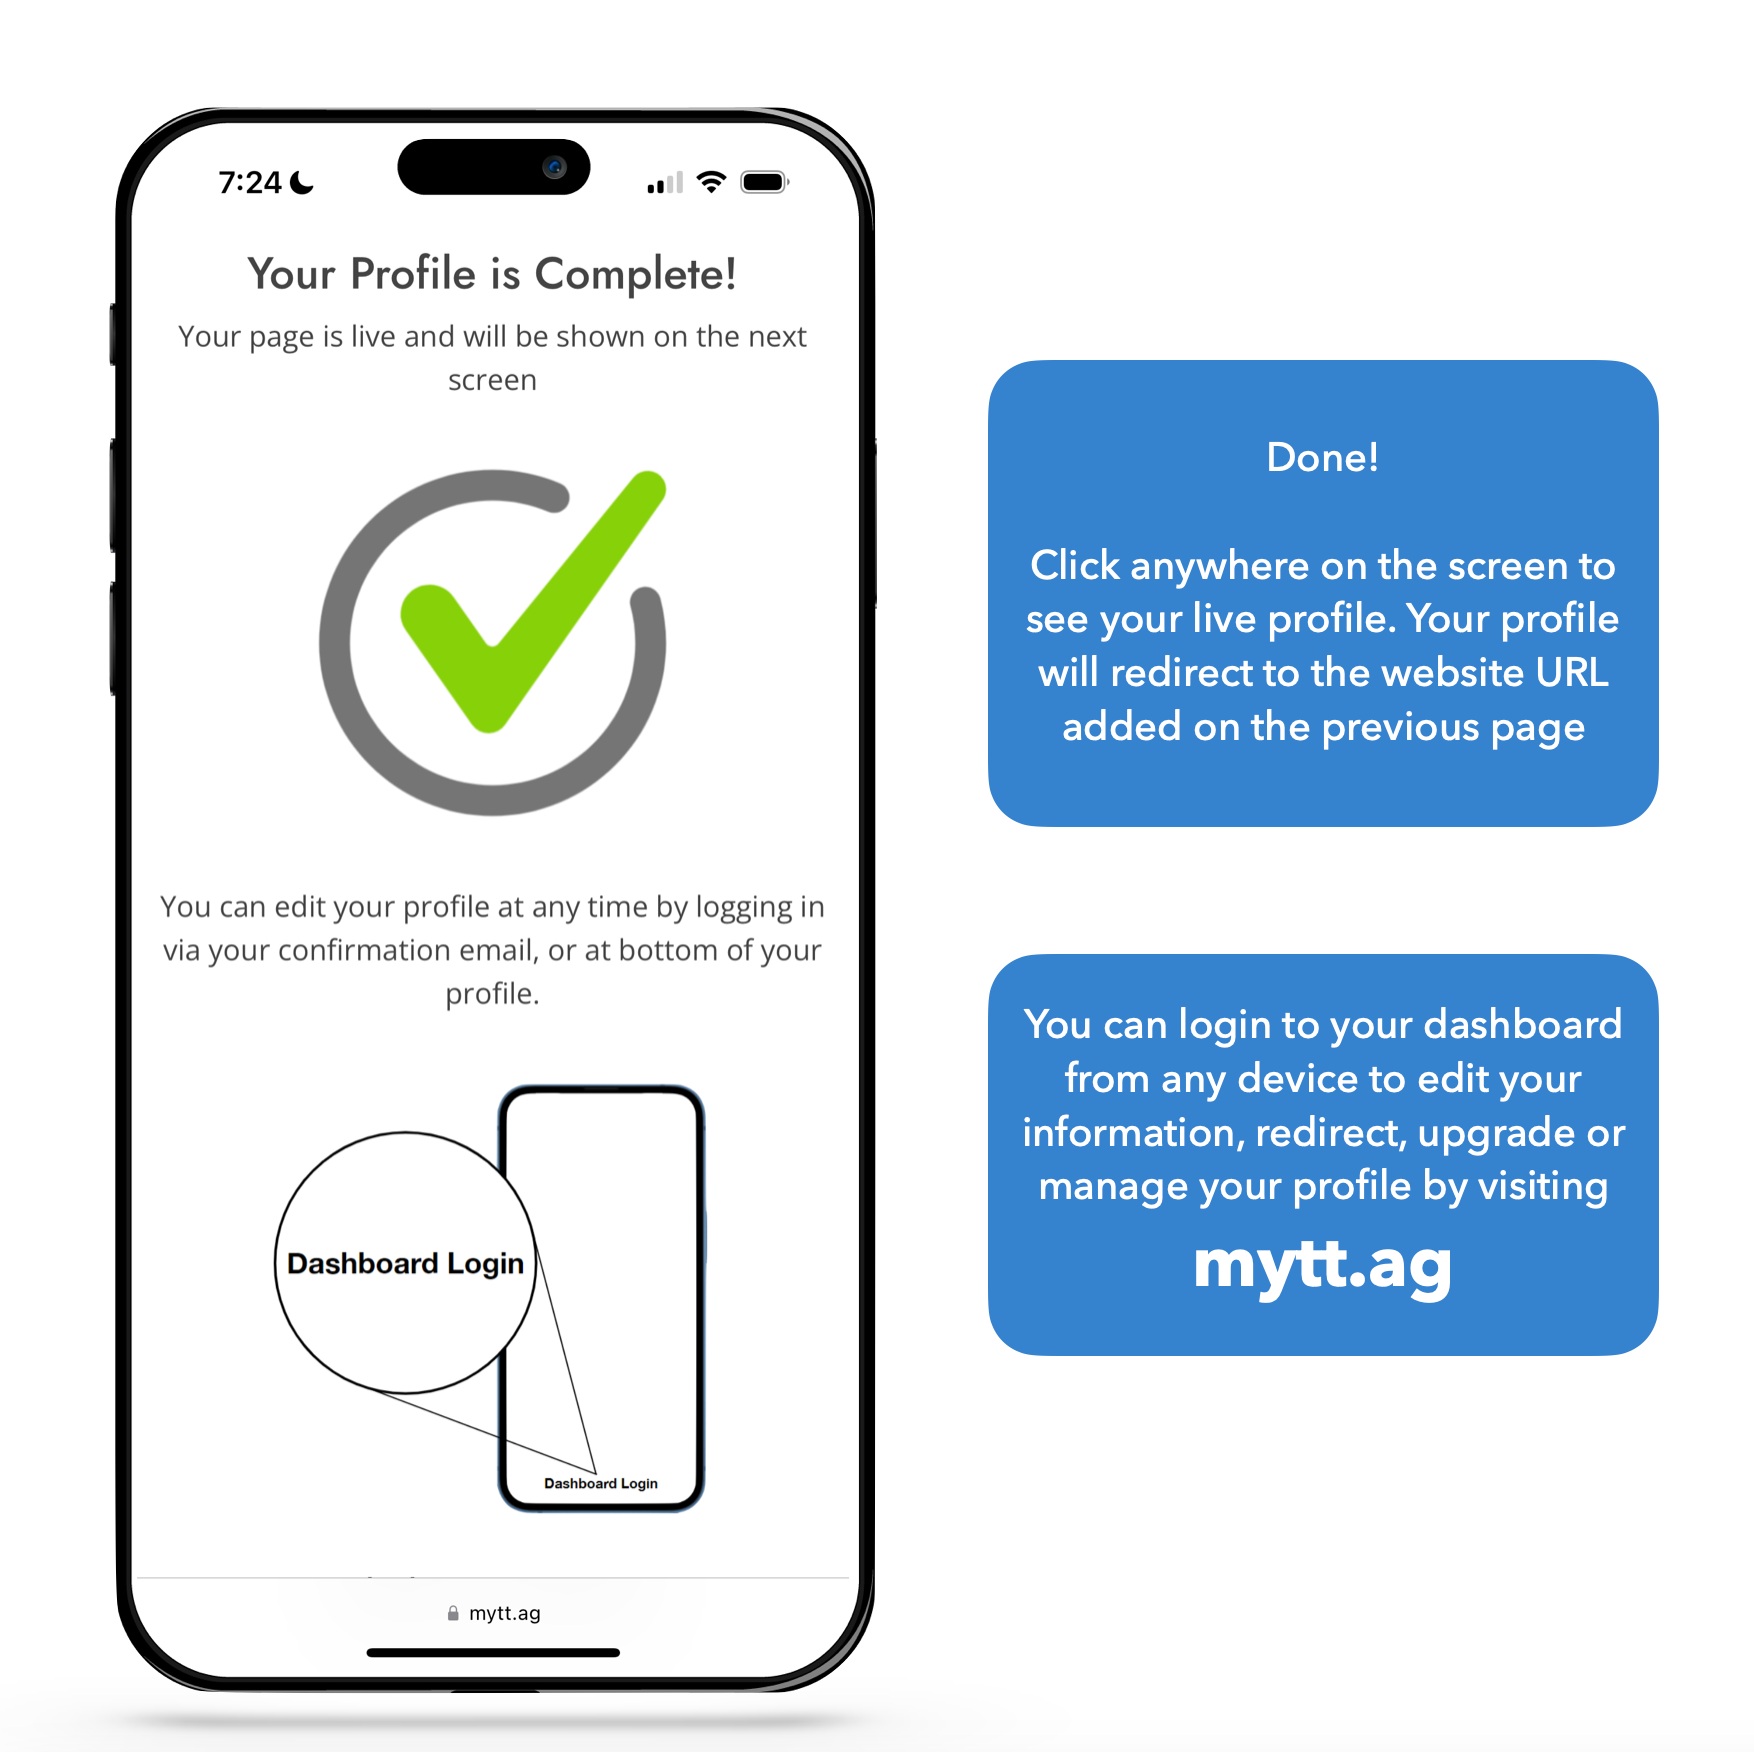
Tap this completion screen to see your profile live for the first time, this is how others will see it too.
You can edit or manage your profile, redirect it, or download your QR code from any computer, all updates affect your Tap Tag in realtime.
Every Tap Tag comes in setup mode. To enter setup mode scan your item by tapping or scanning its QR code (if it has one).
When your Tap Tag(s) arrive you can choose to setup as individual accounts, or set up one and pair others to it.
Enter an email and password into the first field to start setup.
Okay, this page is 🍰. Next!
We offer two different systems that your Tap Tag can run off of, choose the second that says "Review Profile."
Digital Business Card platform: For those that want to use their Tap Tag like a business card. Clients that scan your Tap Tag will be able to save your contact information into their phone, view your socials, websites, and more.
Review Capture platform: For those that want to capture reviews for their business from Google, TrustPilot, TripAdvisor or any other review platforms.
Take a moment to read through the features we offer. More information below.
Here you will choose what clients see when your Tap Tag is scanned.
We integrate directly with Google, so if you want to add your Google review page type the name of your business into the first box and select the correct location from the dropdown.
Tap this completion screen to see your profile live for the first time, this is how others will see it too.
You can edit or manage your profile, redirect it, or download your QR code from any computer, all updates affect your Tap Tag in realtime.
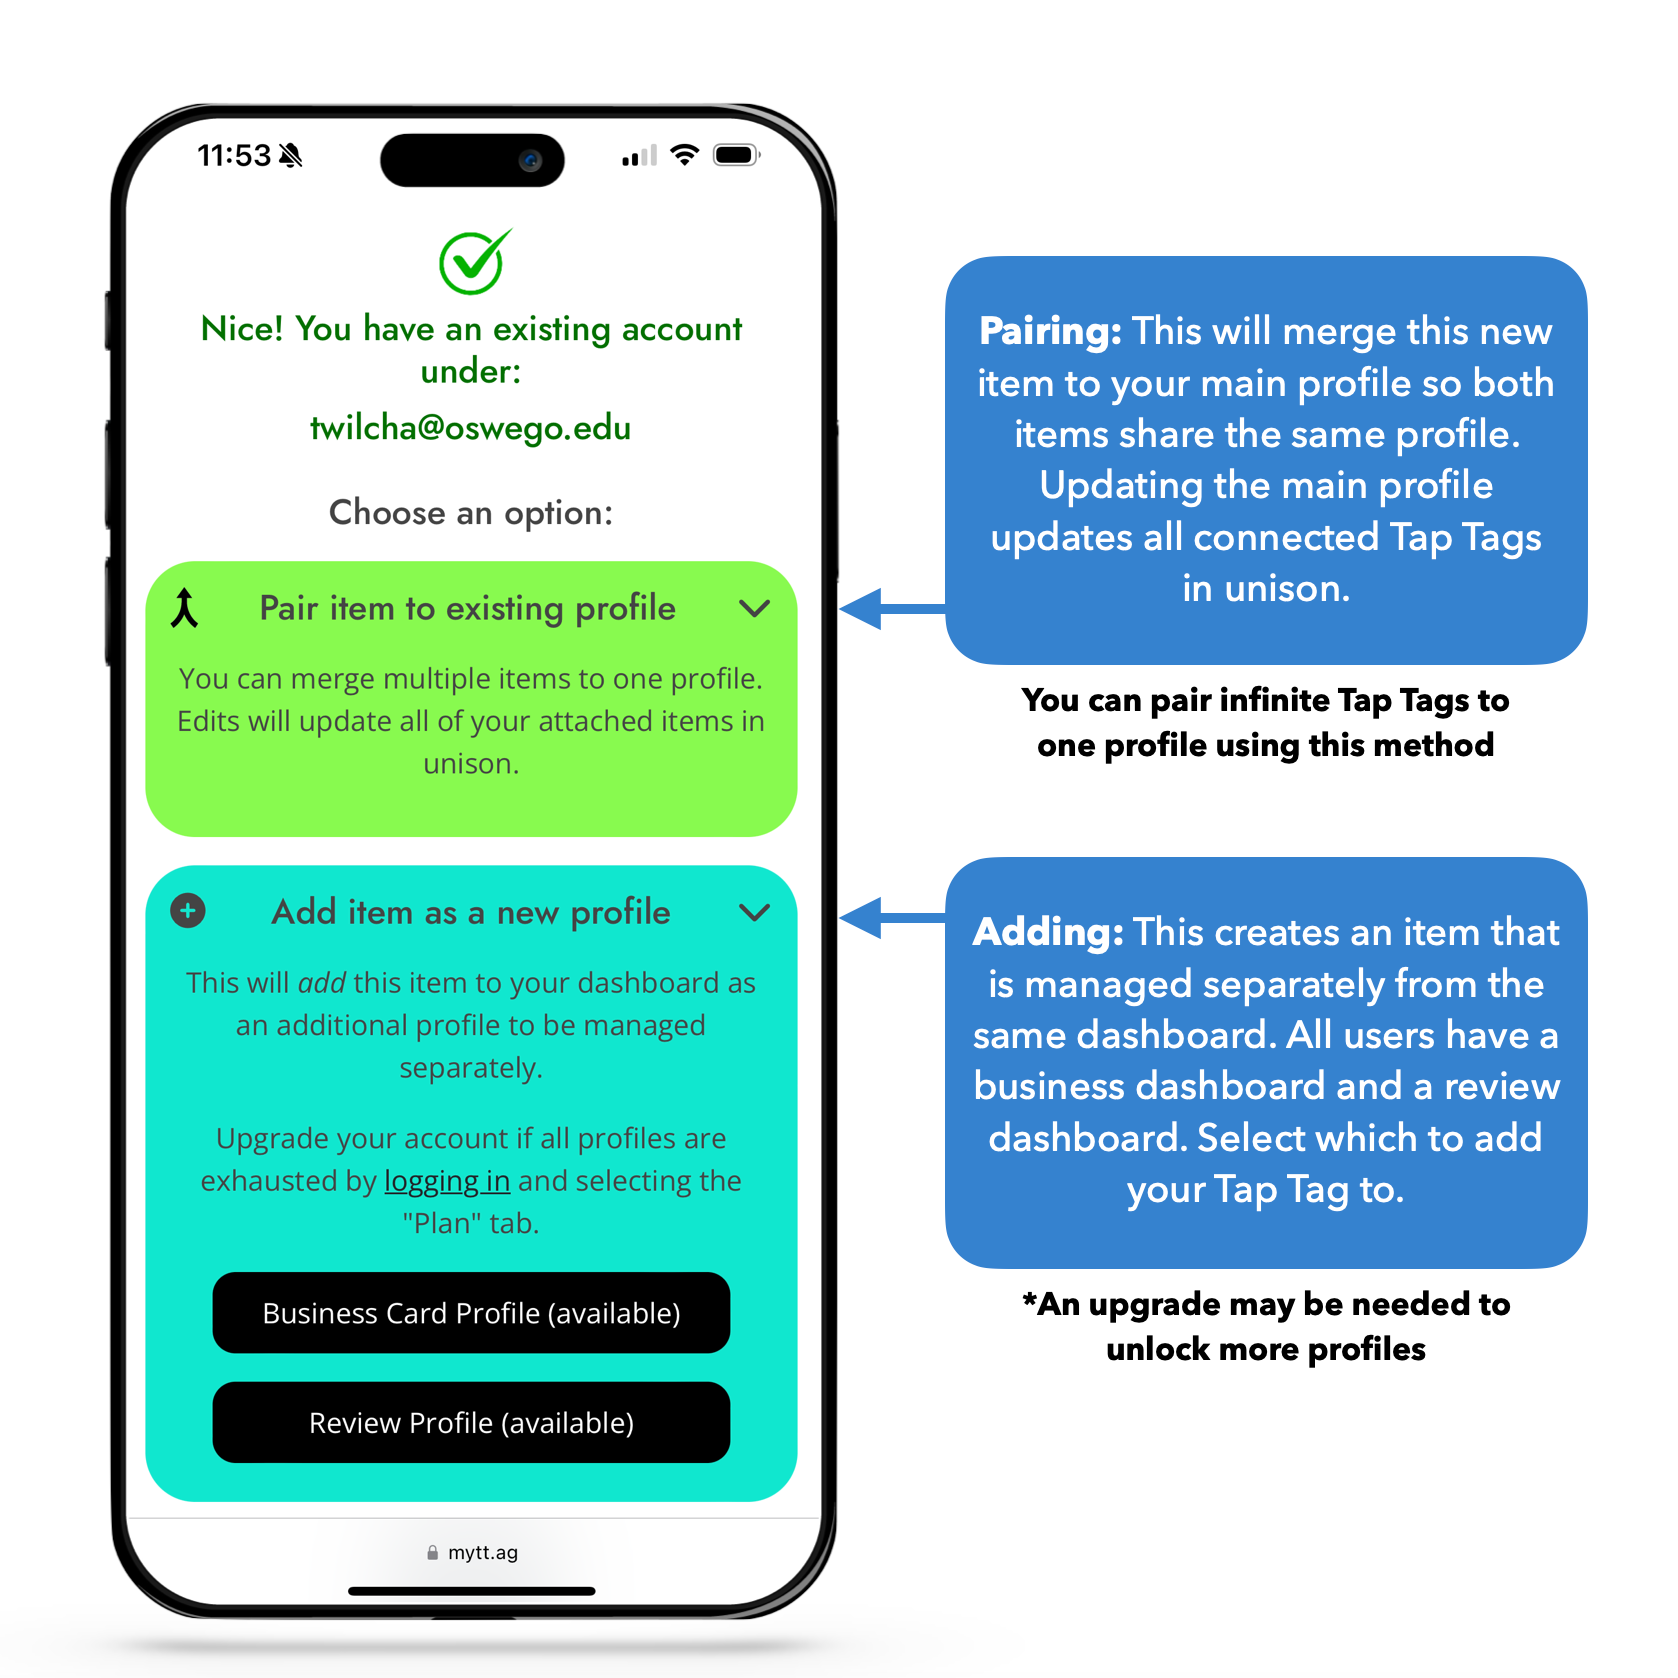
You can merge Tap Tags together to act as one, or setup as separate entities managed from the same dashboard.
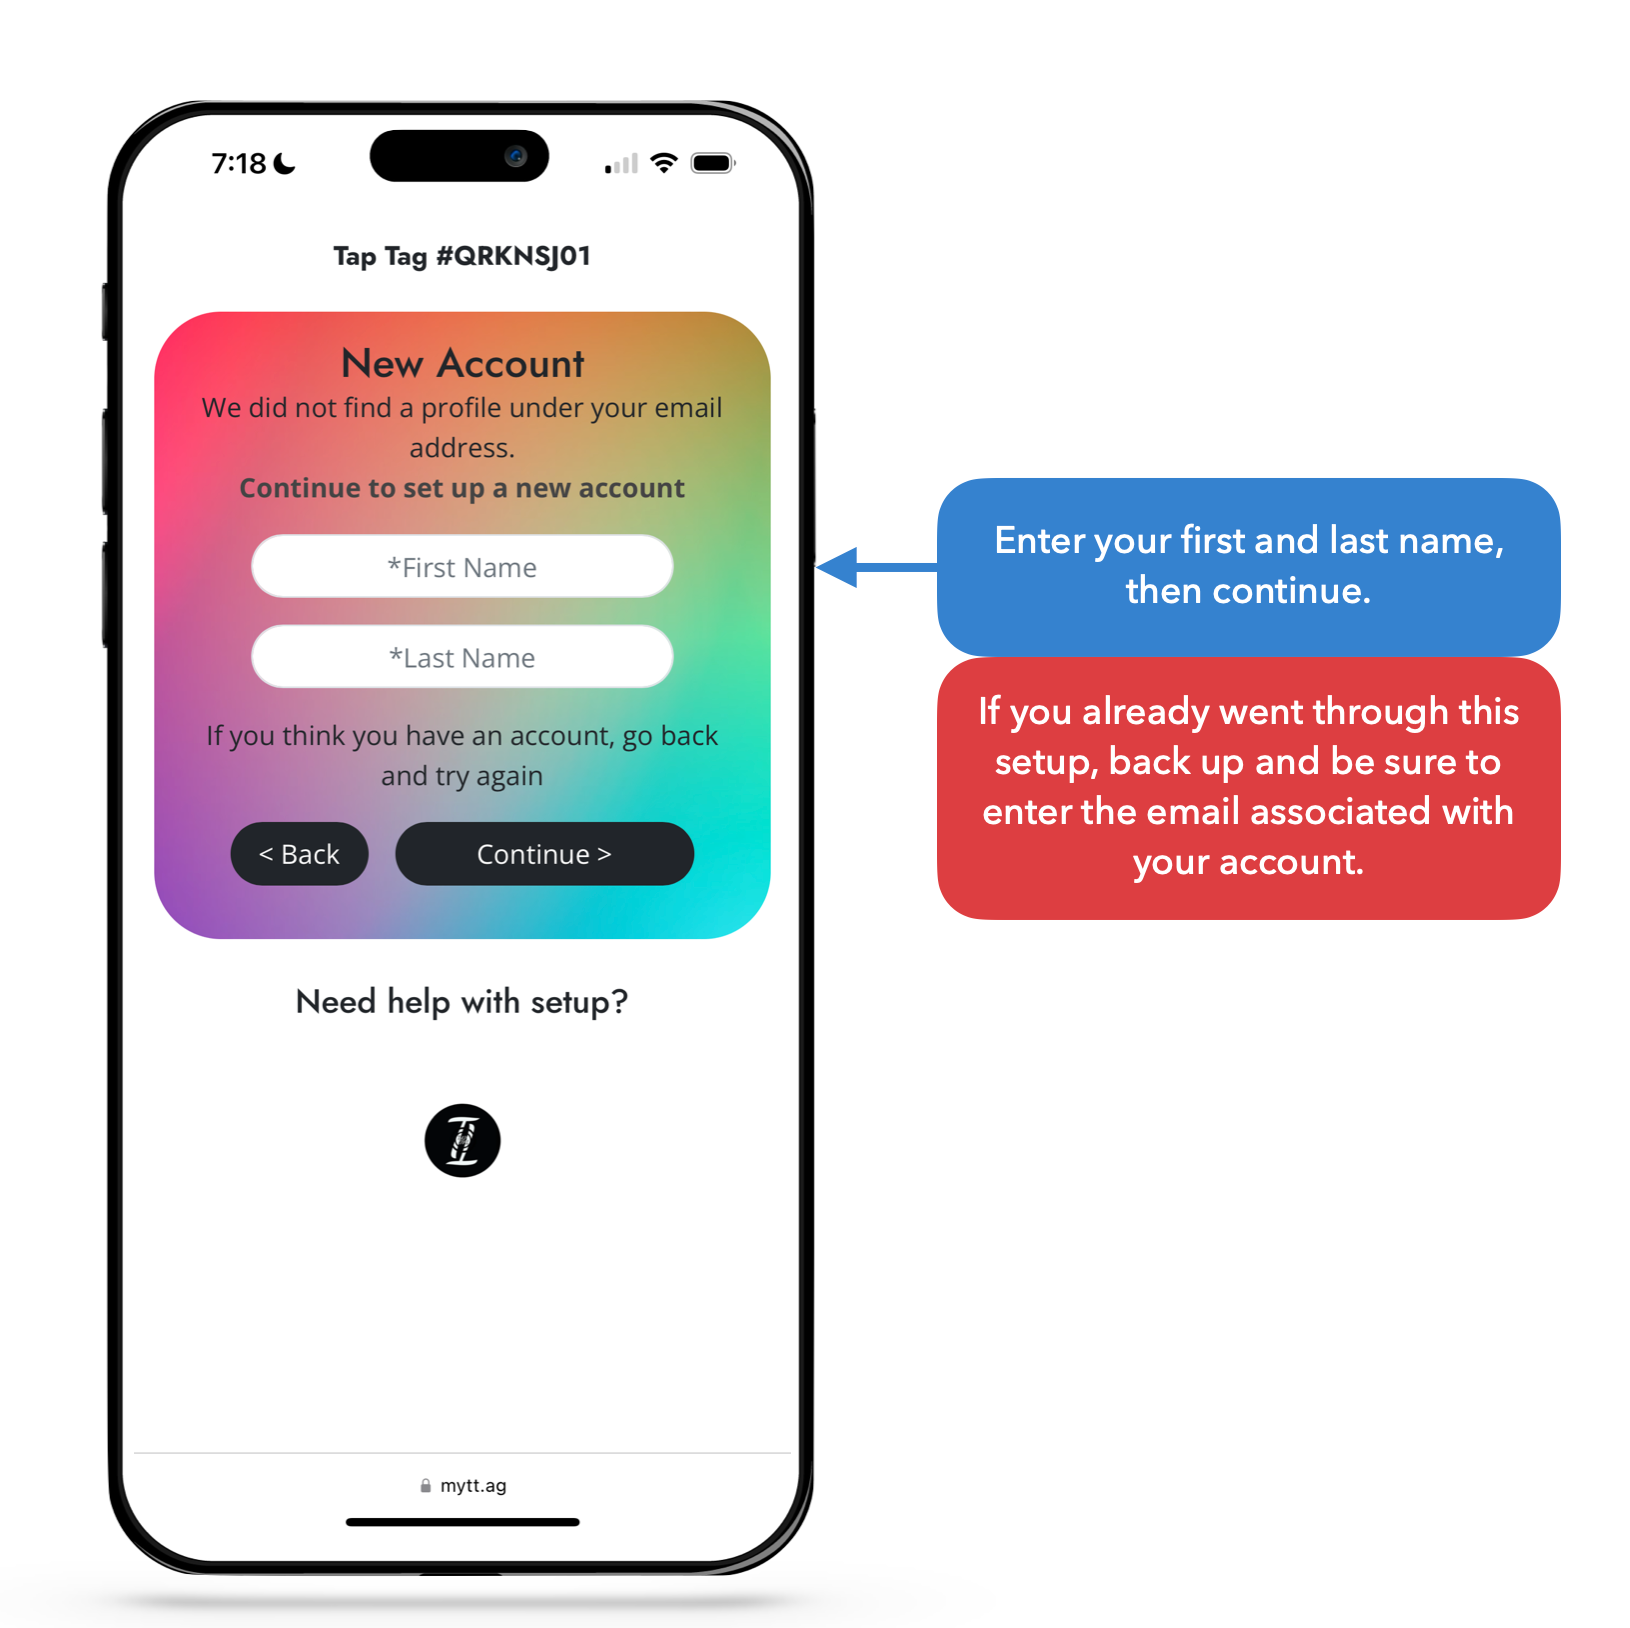
To initiate, enter your previously-created login credentials on the setup screen where it says "Create account or Login." The system will detect that you already exist and offer the options shown here.
Pair: This will merge this new item to your existing profile so both profiles update in unison, both serving the same profile. See full direction on pairing here.
Add: This adds the item to your profile to be managed as a separate entity. An upgrade may be needed for this option. See full directions about adding here.
You can merge Tap Tags together to act as one, or setup as separate entities managed from the same dashboard.
To initiate, enter your previously-created login credentials on the setup screen where it says "Create account or Login." The system will detect that you already exist and offer the options shown here.
Pair: This will merge this new item to your existing profile so both profiles update in unison, both serving the same profile. See full direction on pairing here.
Add: This adds the item to your profile to be managed as a separate entity. An upgrade may be needed for this option. See full directions about adding here.

After creating your first profile, you can log in from any device to edit your information. Any edits will affect your Tap Tag(s) remotely in real time. It will also affect any printed QRs, links, or items associated with your edited profile.
Log in to your dashboard here
After creating your first profile, you can log in from any device to edit your information. Any edits will affect your Tap Tag(s) remotely in real time. It will also affect any printed QRs, links, or items associated with your edited profile.
Log in to your dashboard here
Where to scan
iPhone Tips
On an iPhone, the NFC reader is located in the very top center of the phone, right behind the front-facing camera. The tag will scan from the frontside or backside of phone.
NFC is always on, starting at the iPhone XR and newer (2018)
The phone must be unlocked to scan, sometimes the always-on display of newer iPhones is deceiving, make sure the user unlocks phone otherwise it will not scan.
Where to Scan
Android Tips
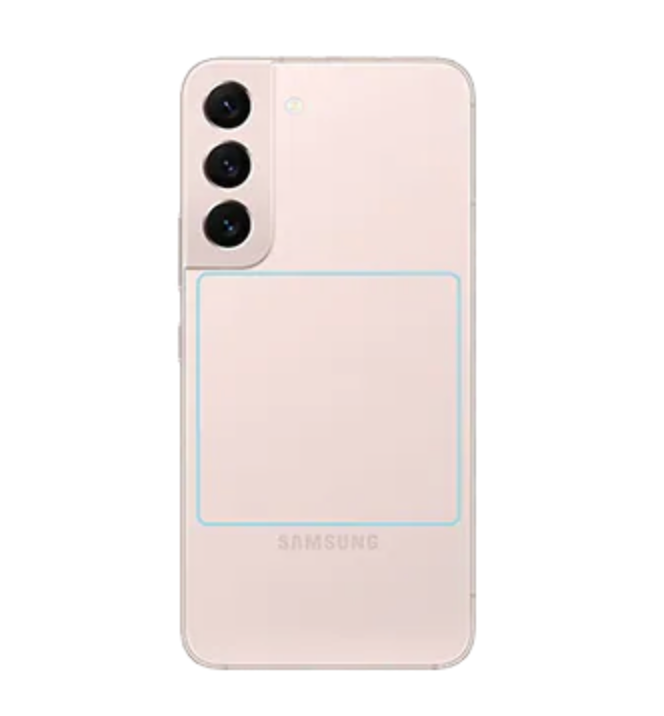
Most Androids scan from the center-backside of the phone.
NFC can be toggled on/off in settings so be sure your NFC is turned on. This will be in settings next to bluetooth and wifi.
NFC defaults to on. Phone must be unlocked to scan.
View all Samsung NFC LocationsFrequently Asked Questions
Are there any reoccurring fees?
No, the ability to create, share, and manage a digital profile with contact sharing features is completely free forever. No strings attached.
However, we do offer optional upgrades that introduce more features such as analytics, lead capture, CRM integration, and much more. Compare Free vs. Pro
I just received my Tap Tag - How do I set it up?
Scroll to the top of this page to see how to set up a digital business card.
First tap or scan your item to enter setup mode then proceed to follow the on-screen steps.
I am not sure how to scan my Tap Tag / Tap Tag not working
At the top of this page is a helpful graphic how to scan. Please ensure you view the graphic and read the tips.
If still not scanning, ensure your phone is compatible. iPhone XR, 11, 12, 13, 14, 15, and newer have NFC automatically turned on.
Most androids have NFC, ensure NFC is turned on in settings next to wifi and bluetooth.
Ensure there is no metal between your phone and Tap Tag.
How do I redirect my tag straight to a website?
Follow the steps on this page to step 3: Choose platform. Under the two options is an option to "Redirect to third-party website." Select it and paste any website URL then save.
Already set up the profile? Login to mytt.ag and select "Profile Mode," select redirect and paste the URL. Save.
How to pair Tap Tags together to act as one?
Easy! Simply tap or scan Tap Tag to enter its setup mode. Use the first block to login using your previously-made login credentials.
The system will detect that you have an account and offer to pair the newest item to a previous item. It will also offer to add the item as a separate profile.
Pairing: Both items serve the same profile, so an update to the profile will update all connected items in unison.
Adding: This adds the item as a separate manageable profile on your dashboard, each item serves a different profile. This option may require an upgraded package.
How to add more profiles to my dashboard?
This may require an upgraded package. Enter Tap Tag setup mode by scanning a new item, select the second option to "link to parent account"
There are multiple ways to accomplish this.
Login: Simply login to the first option in setup mode, then on the next screen select the second option to add to your account.
Parent account code: Find the parent code on your dashboard. Enter it into the parent account code box.
Link a new profile button: This button is found on your dashboard. Click it. Then, enter setup mode on your Tap Tag and enter the Tap Tag # found at the top of setup mode.
Employee login: Use the create new profile button found on your dashboard, create the profile to completion. Select permissions to assign a login to that new profile. Tap the item to enter setup mode and login to pair Tap Tag to that new profile.
Tell me more about the software (mytt.ag)
You can find all the information about our software on this page
Tell me more about NFC (near field communication)
NFC is a technology allowing short-range data transfer between devices. This transaction can be achieved up to about 3 inches between each piece of equipment. Having a phone with a case can slightly shorten this distance.
All of our products have this technology as do the majority of smartphones. This allows the data from your contact details within your Tap Tag to transfer to a smartphone from only a few inches away. This is a low-energy, speedy transfer and can be done infinite times.
Does Tap Tag have a referral program?
Yes! There are multiple ways to earn including by referring sales. Learn more about our Affiliate Program.
Can I manage a team of business cards from one dashboard?
Yes, we do have a Team plan available to manage multiple profiles from one dashboard
Most smartphones that were released since 2018 have NFC by default. Check to see if your phone is compatible.
Helpful Posts
How to Password Protect NFC Tags
How to Password Protect an NFC Tag One of the many great features on consumer NFC tags are that they can be reprogrammed with new information over and over again. You could be a restaurant or coff...
How to Program or Reprogram an NFC Tag
How to Program or Reprogram an NFC Tag In about 45 seconds using a free smartphone app and a couple of steps NOTE: All Tap Tags come with easy-to use software by default, this software allows yo...
What is NFC?: Exploring the Benefits and Applications of Near Field Communication (NFC)
What is NFC?: Exploring the Benefits and Applications of Near Field Communication (NFC) You may have recently heard chatter about NFC, RFID, contactless sharing or mobile payments. Maybe...